Footer Widgets
The main portion of the VIGIL footer is a a widgetized section that can display widgets. Widgets add various content or features to your site. They can be added, removed, and rearranged in the WordPress Administration Appearance > Widgets panel.
How to add Widgets to the Footer
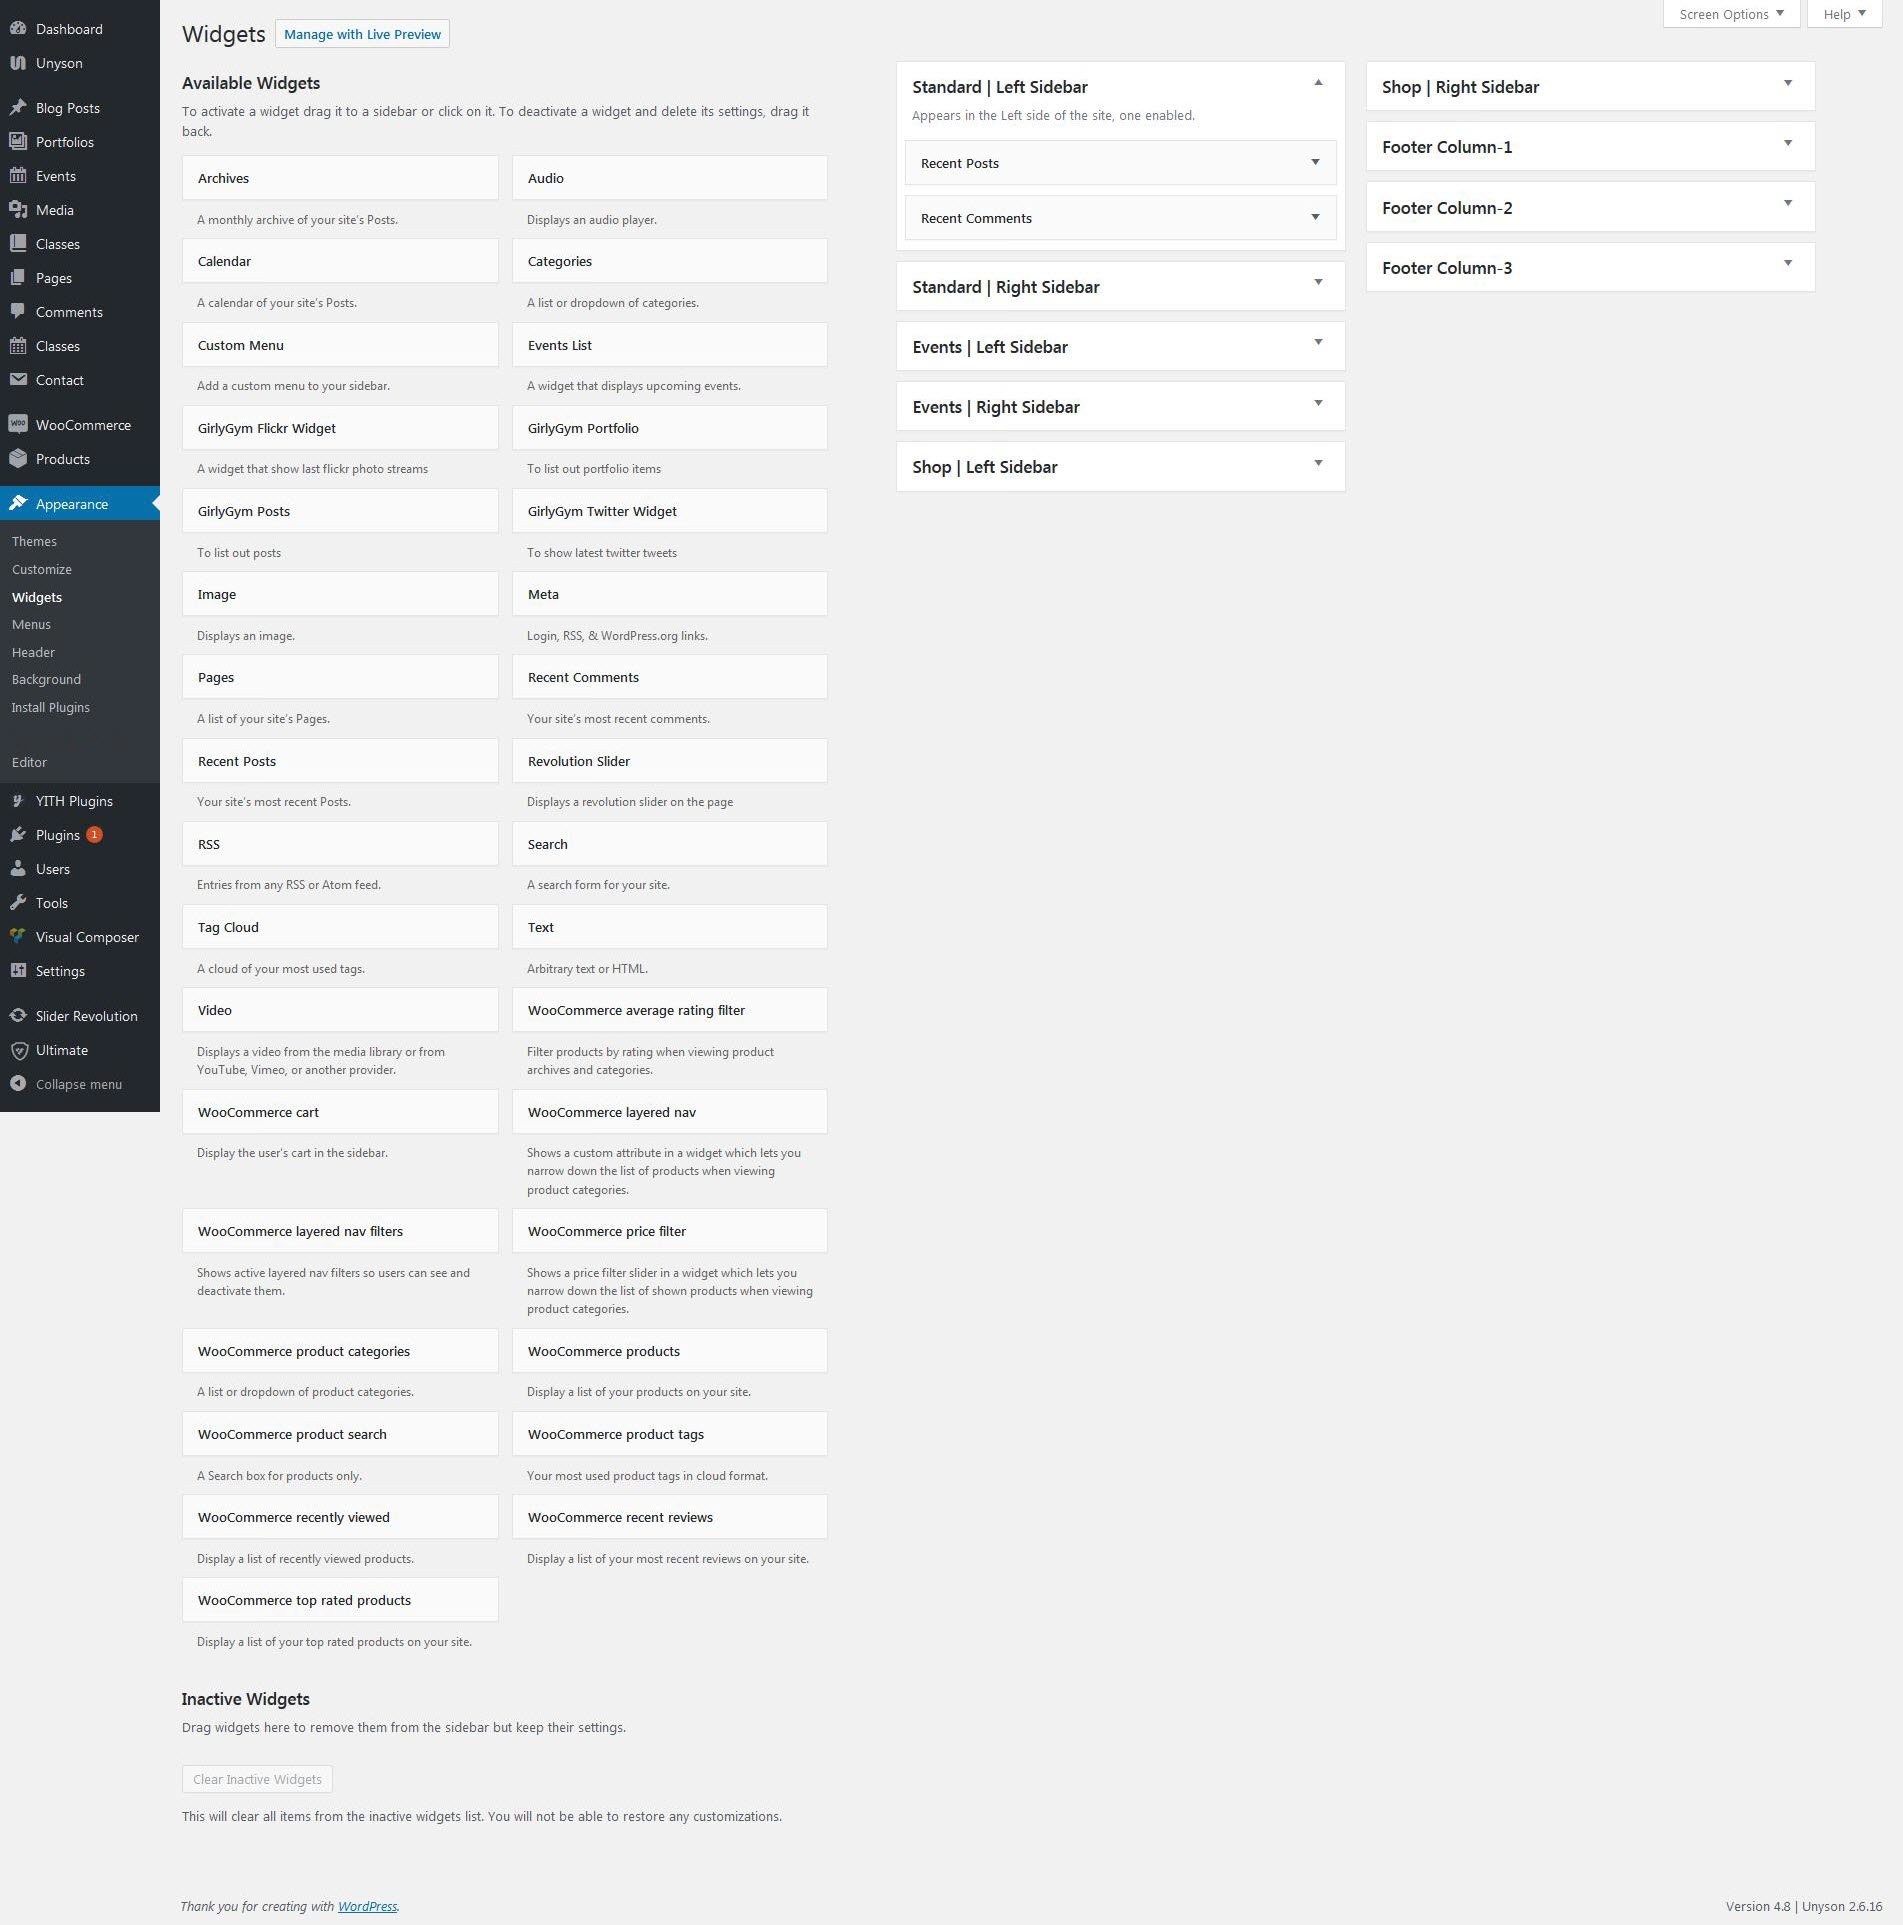
Step 1 – First make sure footer widgets are set to show, navigate to Appearance > Theme Options > Footer and check the “Footer Widgets” box. Also set the footer columns here.
Step 2 – Next navigate to Appearance > Widgets. to access the widgets and footer widget sections.
Step 3 – You will see a “Footer Widget” section on the right hand side for each Footer column you selected to have in theme options.
Step 4 – On the left hand side are your widgets, simply drag and drop the widgets you want from the left side into the “Footer Widget” sections on the right side. See the screenshot below.
How to add widgets to footer ?
- Once you have enabled Column Layout for footer using above options, than navigate to Dashboard -> Appearnce -> Widgets.
- Here you can find new widget areas created with the name of Footer Column, suffixed with columns count.
- Drag and drop the widgets from left hand side and configure widgets as per your needs.
- Now save the widgets and look at the frontend for your newly created widgets.


Leave A Comment?