How to Install Insurance via WordPress
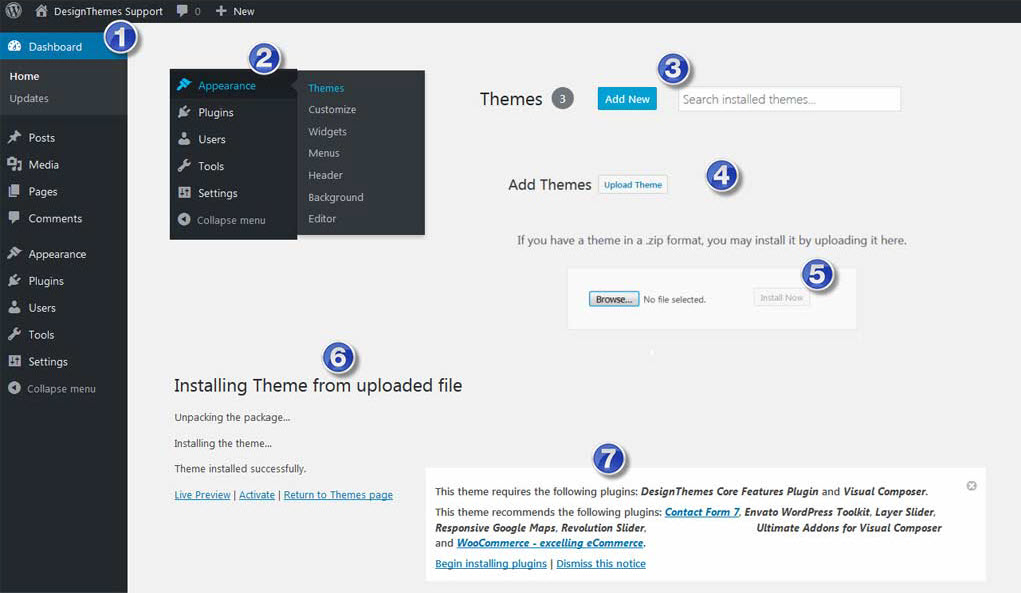
Step 1 : Navigate to WordPress Dashboard > Appearance > Themes.
Step 2 : Click the ‘Add New’ button on top of the page, then the ‘Upload Theme’ button.
Step 3 : Click ‘Choose File’ and find the theme files you’ve just downloaded. If you’ve downloaded the installable WordPress file, then you do not need to unzip the file. If you’ve downloaded the Full Theme Package, you have to unzip the master Insurance.zip file, therein you will see a secondary Insurance.zip file, this is the one you select to install.
Step 4 : Once the file has uploaded, to activate Insurance go to WordPress Dashboard > Appearance > Themes and click the Activate button.
Step 5 : Once you activate Insurance, you will be redirected to our Welcome Screen.
Step 6 : Then you will get a notification message to activate the required & recommended plugins: ‘DesignThemes Core Features Plugin’, ‘WPBakery Visual Composer’, ‘Responsive Styled Google Maps’, ‘Contact Form 7’, ‘LayerSlider WP’ and ‘Revolution Slider’.
Step 7 : Once after the required plugins are activated, navigate to Settings > Permalinks, and select ‘Post Name’ in ‘Common Settings’ tab and save it finally.

Leave A Comment?