STEP 1
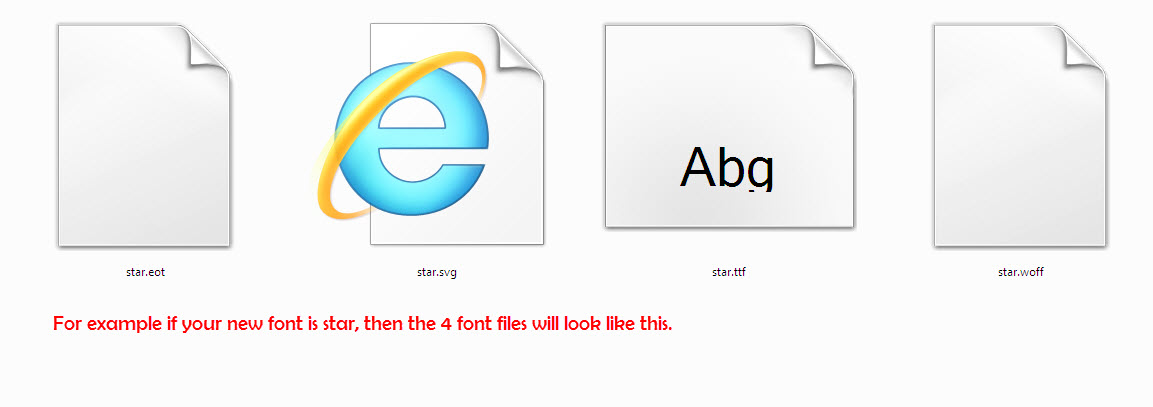
First download your custom font and make sure you have received the 4 web font files, .woff, .ttf, .svg, .eot. Each one is needed.
STEP 2
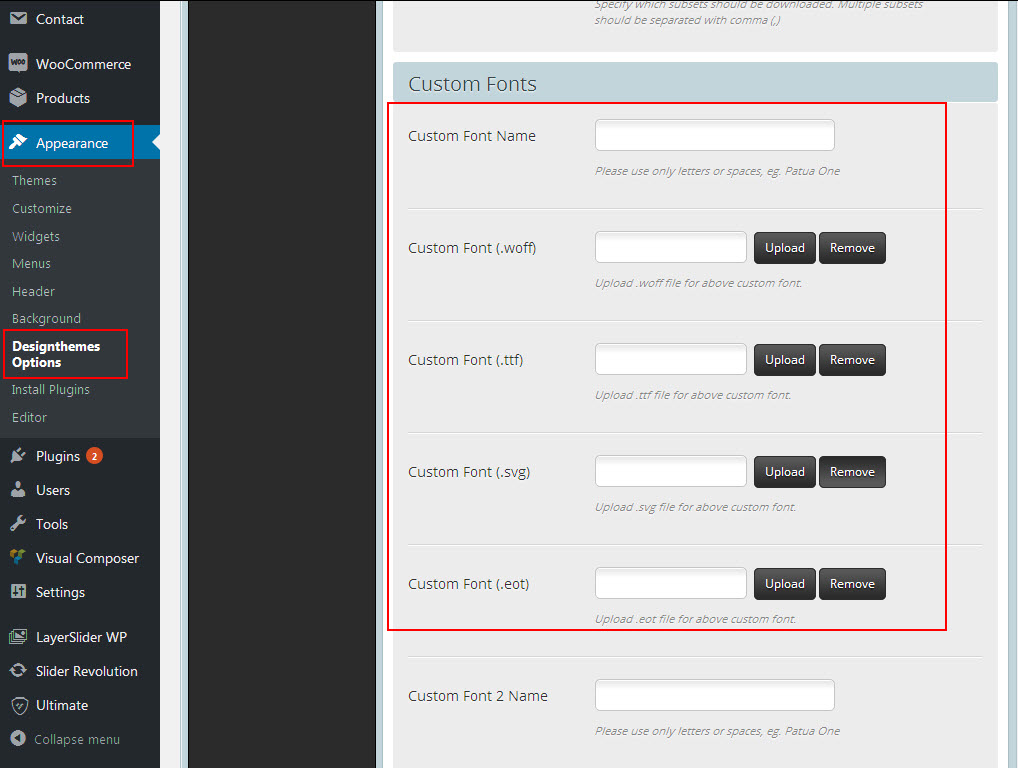
Navigate to Dashboard > Appearance > Designthemes Options > Fonts > Font Family > Custom Fonts and you will see Custom Font fields, one for each of the font files listed above.
STEP 3
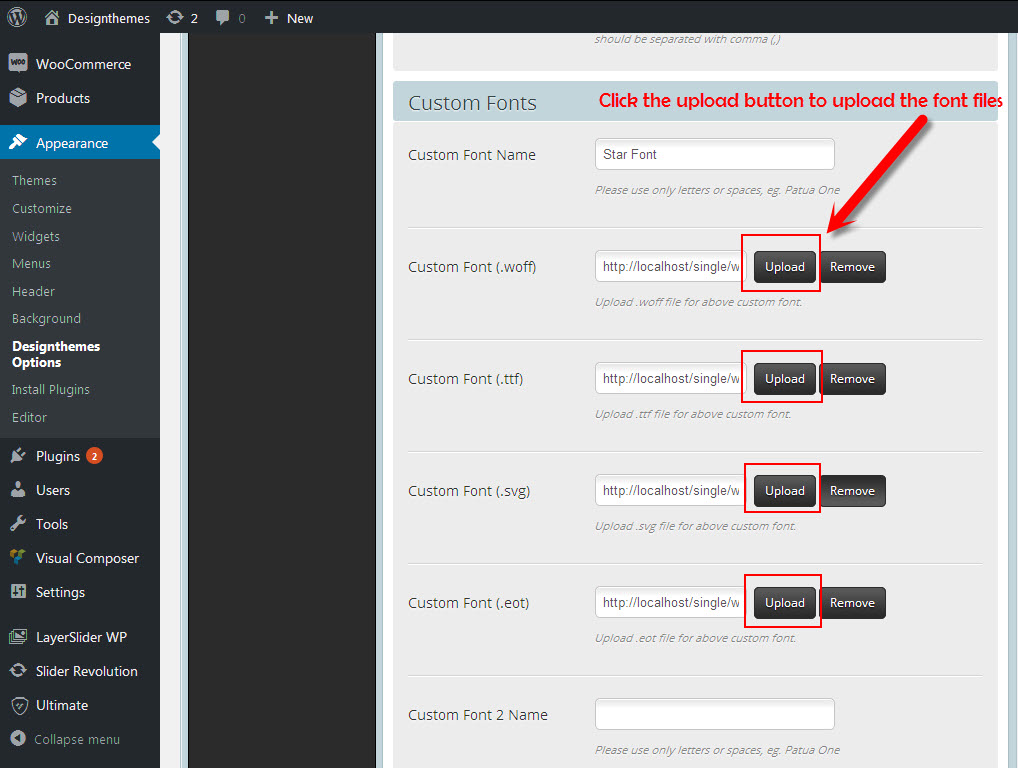
Upload the 4 individual font files into the corresponding field by clicking the “Upload” button and selecting each file.
STEP 4
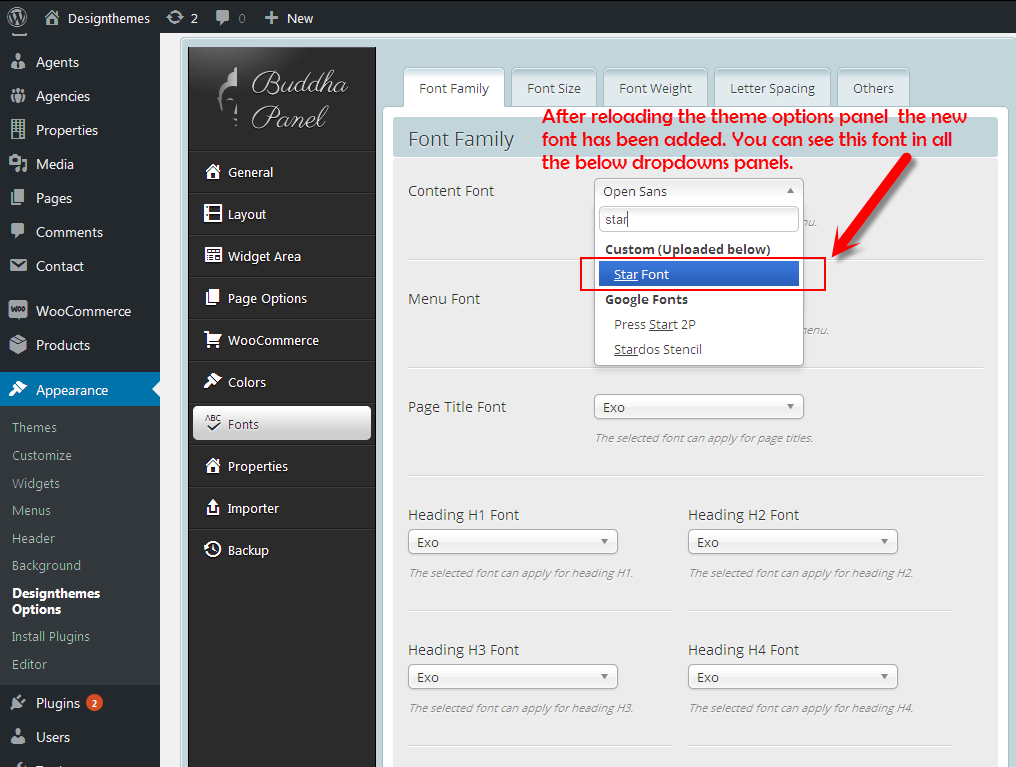
After you have uploaded all custom font files, just reload the theme options panel and the custom font that you have added will be loaded in the font dropdown as shown in the screenshot. Now you can select that font for the section that you need.
Thats it!!! You are done adding the new font.
1. Add the font files .woff, .woff2, .ttf, .svg, .eot which was explained earlier in this topic to the fonts folder directly in to your FTP.
2. You need to call the fonts file that you have uploaded to the fonts folder in the css file font-awesome.min.css. Just add the below css code to the bottom of font-awesome.min.css file. Just change the font family name as per your font name.
@font-face {
  font-family: 'Star Font';
  src: url('fonts/star.eot'); /* IE9 Compat Modes */
  src: url('fonts/star.eot?#iefix') format('embedded-opentype'), /* IE6-IE8 */
       url('fonts/star.woff2') format('woff2'), /* Super Modern Browsers */
       url('fonts/star.woff') format('woff'), /* Pretty Modern Browsers */
       url('fonts/star.ttf')  format('truetype'), /* Safari, Android, iOS */
       url('fonts/star.svg#svgFontName') format('svg'); /* Legacy iOS */
}
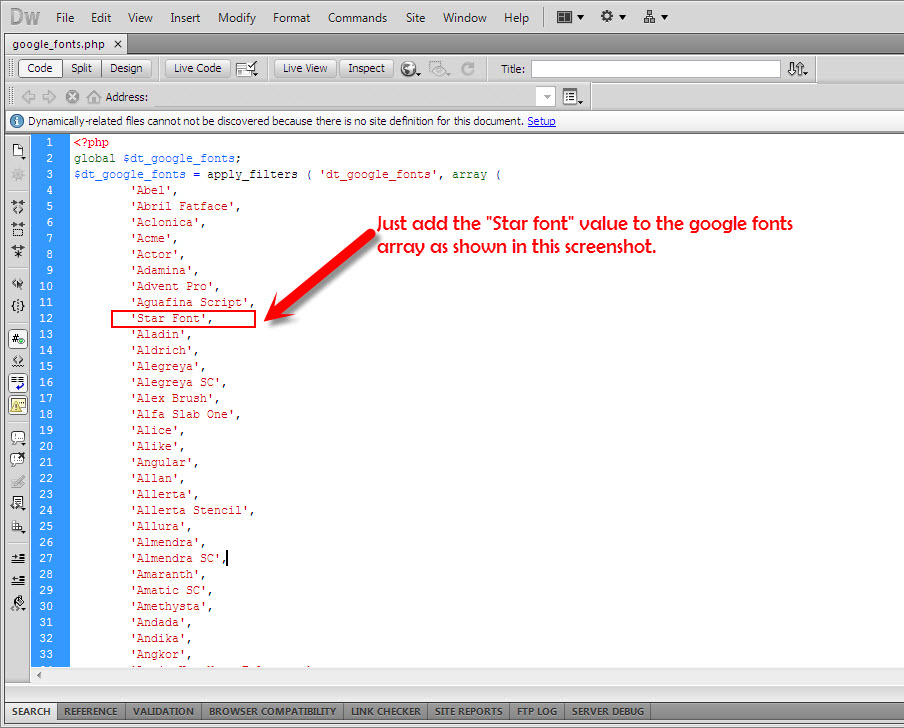
3. Add the font name to Google Fonts php file which is located at wp-content/themes/designthemes/framework/google_fonts.php
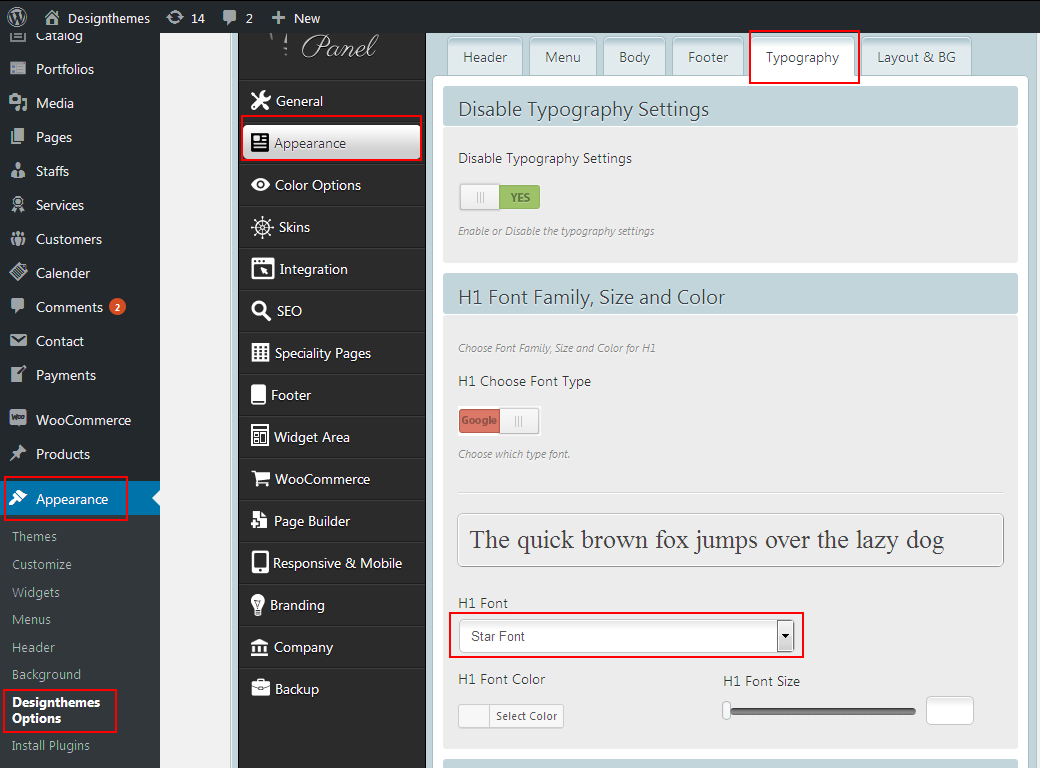
4. Now you can view the new font that you have added. Just navigate to Dashboard > Appearance > Designthemes Option > Appearance > Typography.
5. Just choose the new font for which section, title that is needed for you and click “Save All” at the bottom of the theme options panel.

Leave A Comment?