Theme Options
Baby Photographer has an advanced Framework Options panel that is loaded with options. We have the options organized into logical tabbed sections, each option has a description of what it will do on the front end. Because of the sizable amount of options Baby Photographer provides, we cannot go over them in full detail here in our documentation.
We encourage you to please take some time and navigate through each tab to see what we offer. Go to Appearance > Baby Photography Options in your WordPress admin dashboard to access the theme Options panel. You can also backup your theme options by clicking on the Backup tab. That is a great way to move your custom options from site to site.
General Options
General Settings
- Enable Nice Scroll – Enable or Disable the nice scroll in your site.
- Globally Show Page Comments – Enable or Disable to show comments on all the pages.
- Show all pages in Pagination – Enable or Disable to show all the pages instead of dots near the current page.
- Style Picker – Enable or Disable to show the style picker in your pages.
- Loader Animation – Enable or Disable to show the loading animation in your pages.
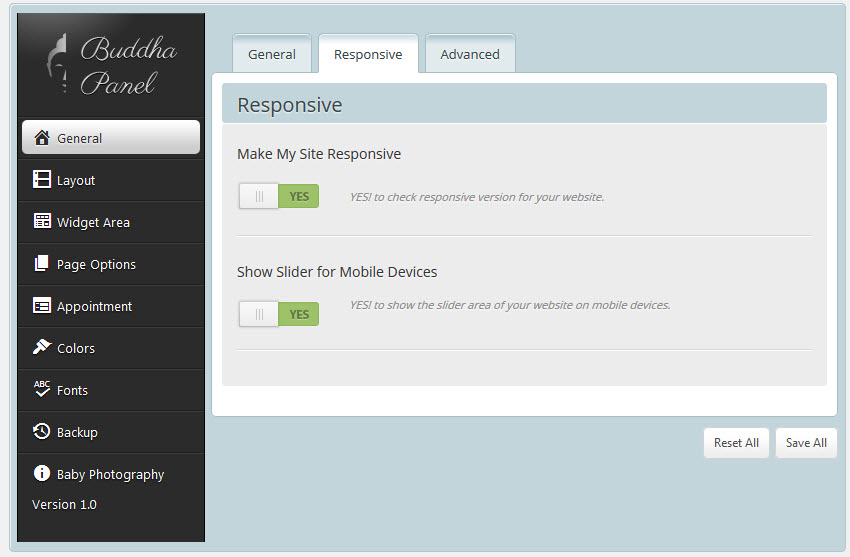
Responsive Settings
- Make My Site Responsive – Enable or Disable your site is responsive or not.
- Show Slider for Mobile Devices – Enable or Disable the sliders for mobile devices.
Advanced Setting
- Static CSS – Enable or Disable to use static CSS files instead of Theme Options.
- Replace Buddha Panel Logo – Enable or Disable the custom admin panel logo. If YES to enable the custom admin panel logo then click on upload button to select admin logo from your media library.


Breadcrumb Options
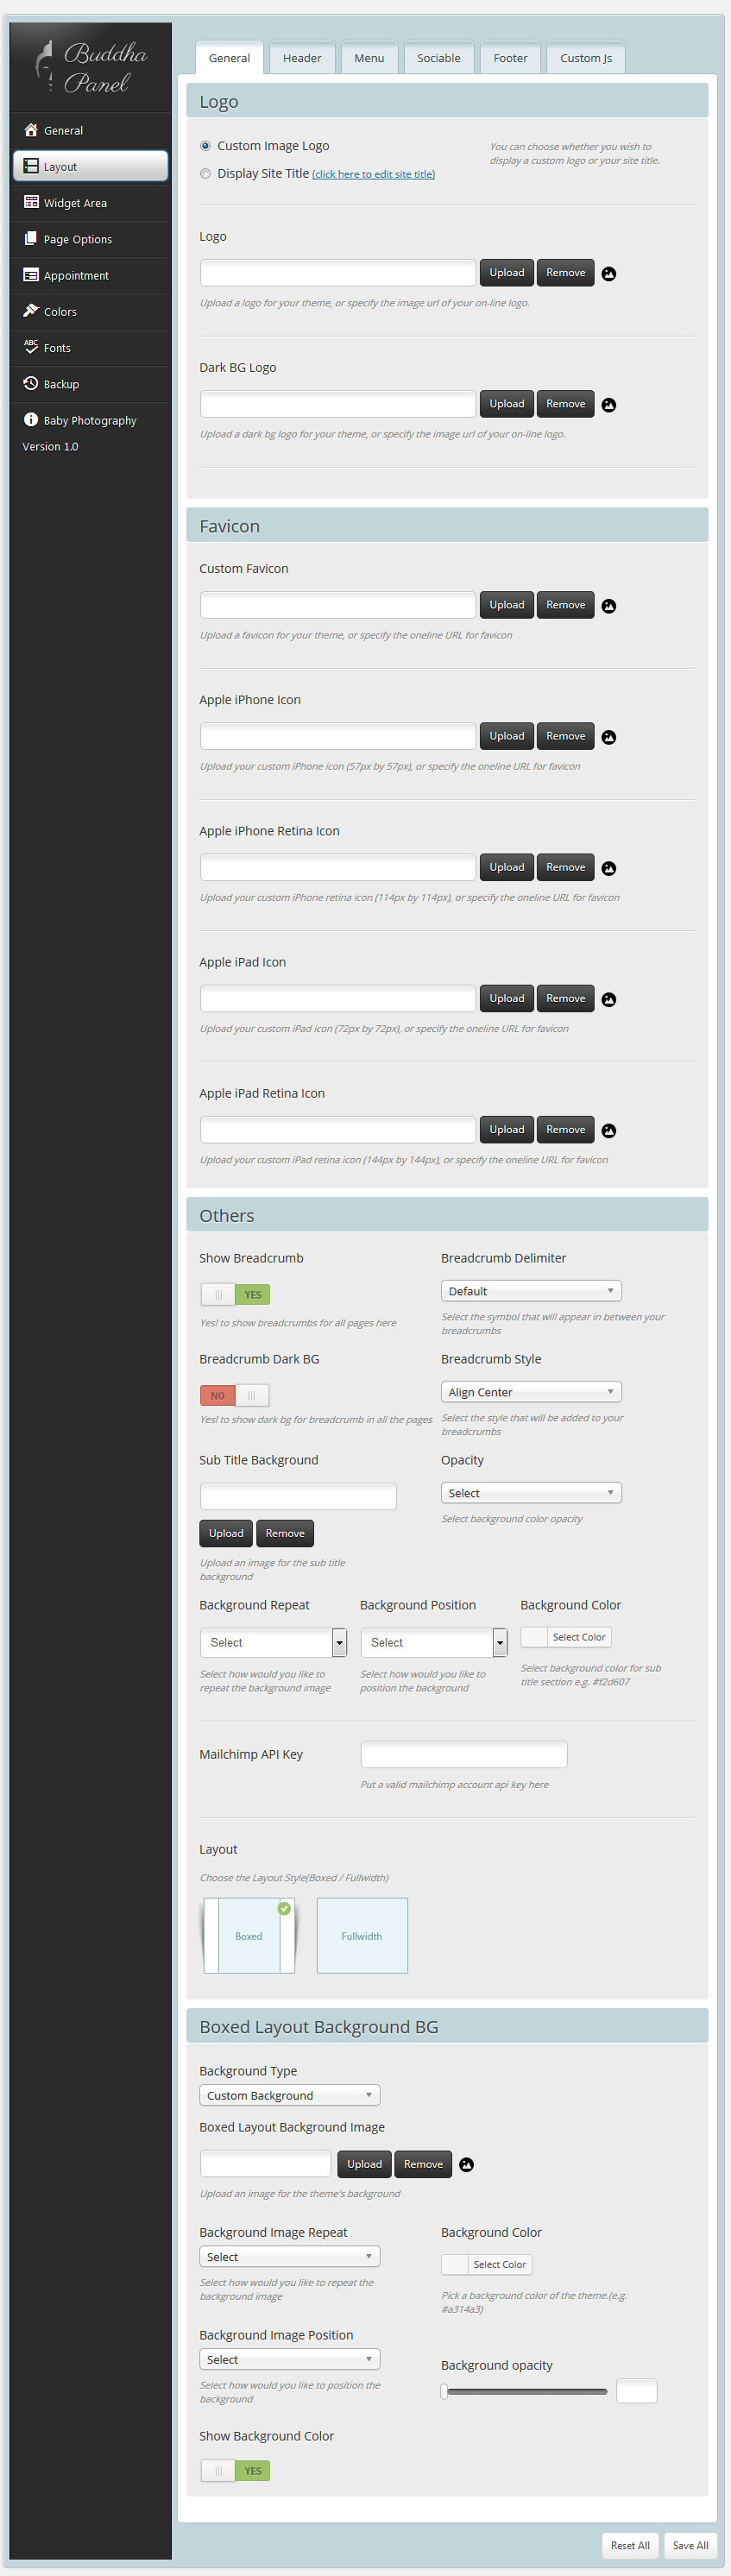
Layout Settings
General Settings
- Logo – upload an appropriate logo for your homepage layout
- Retina Logo – upload an appropriate logo for your homepage layout and retina logo must be 2x larger than a regular homepage logo
- Options – additional options for logo
- Favicon – upload your custom favicon image in .ico format
- Others – Provided with the options like Enable/Disable Breadcrumb, Delimiter, Styles, etc. And also, we can make the Site as Boxed/Fullwidth from here.
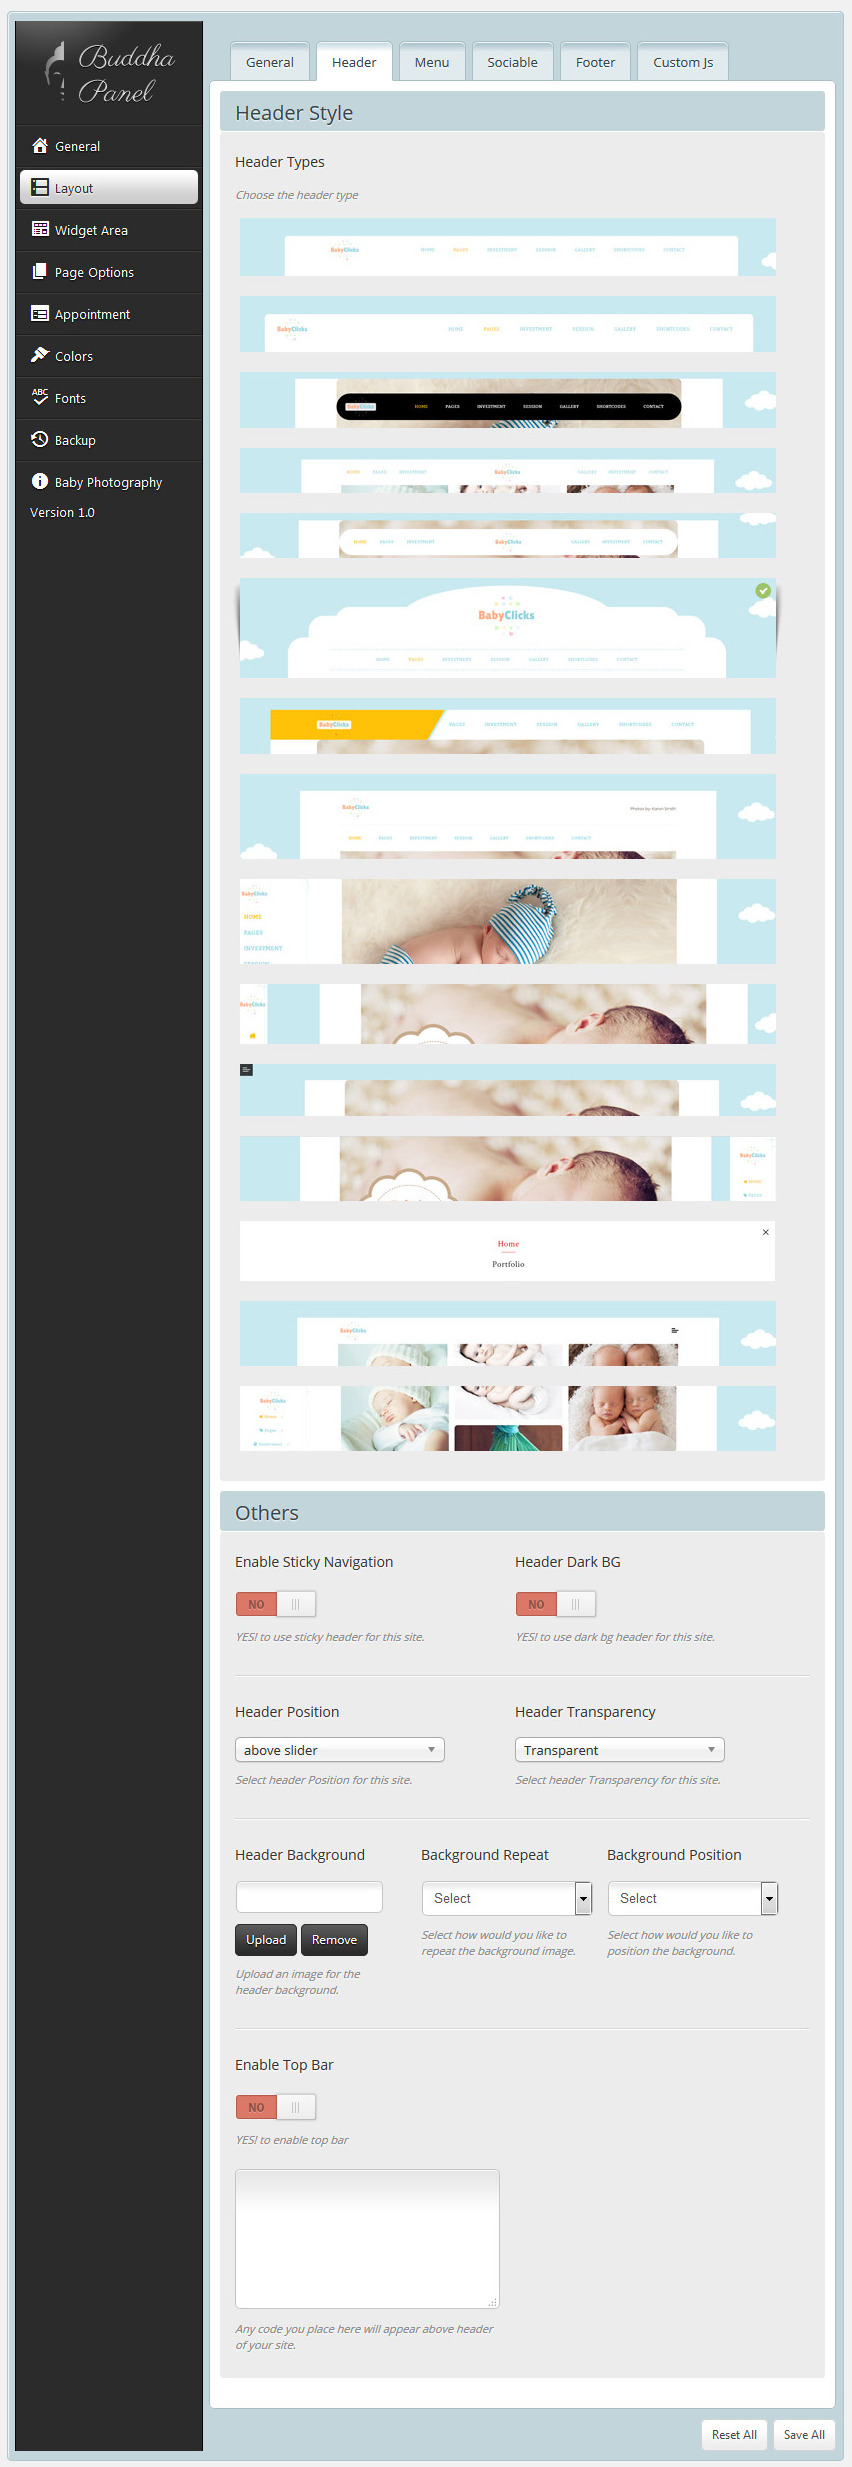
Header Settings
- Header
- Header | Position – Choose a header position (above slider, on slider, below slider).
- Header | Transparency Choose between Semi Transparent or Transparent header Transparency.
- Header | Background – You can select and upload a custom background image, which will be applied for the selected header.
- Header | Sticky – Turn Yes/No to control the sticky navigation
- Header | Darkbg – Turn Yes/No to control the Header Dark BG
- Header | Style – Choose a header style (Fullwidth Header, Boxed Header, Splitted Fullwidth Header, Splitted Boxed Header, Fullwidth Menu Center, Two Color Header, Fullwidth Menu Left, Left Header, Left Header Boxed, Creative Header, Overlay Header).
- Header | TopBar – Enable/Disable the topbar from here. And add the content shortcodes below the switch box.
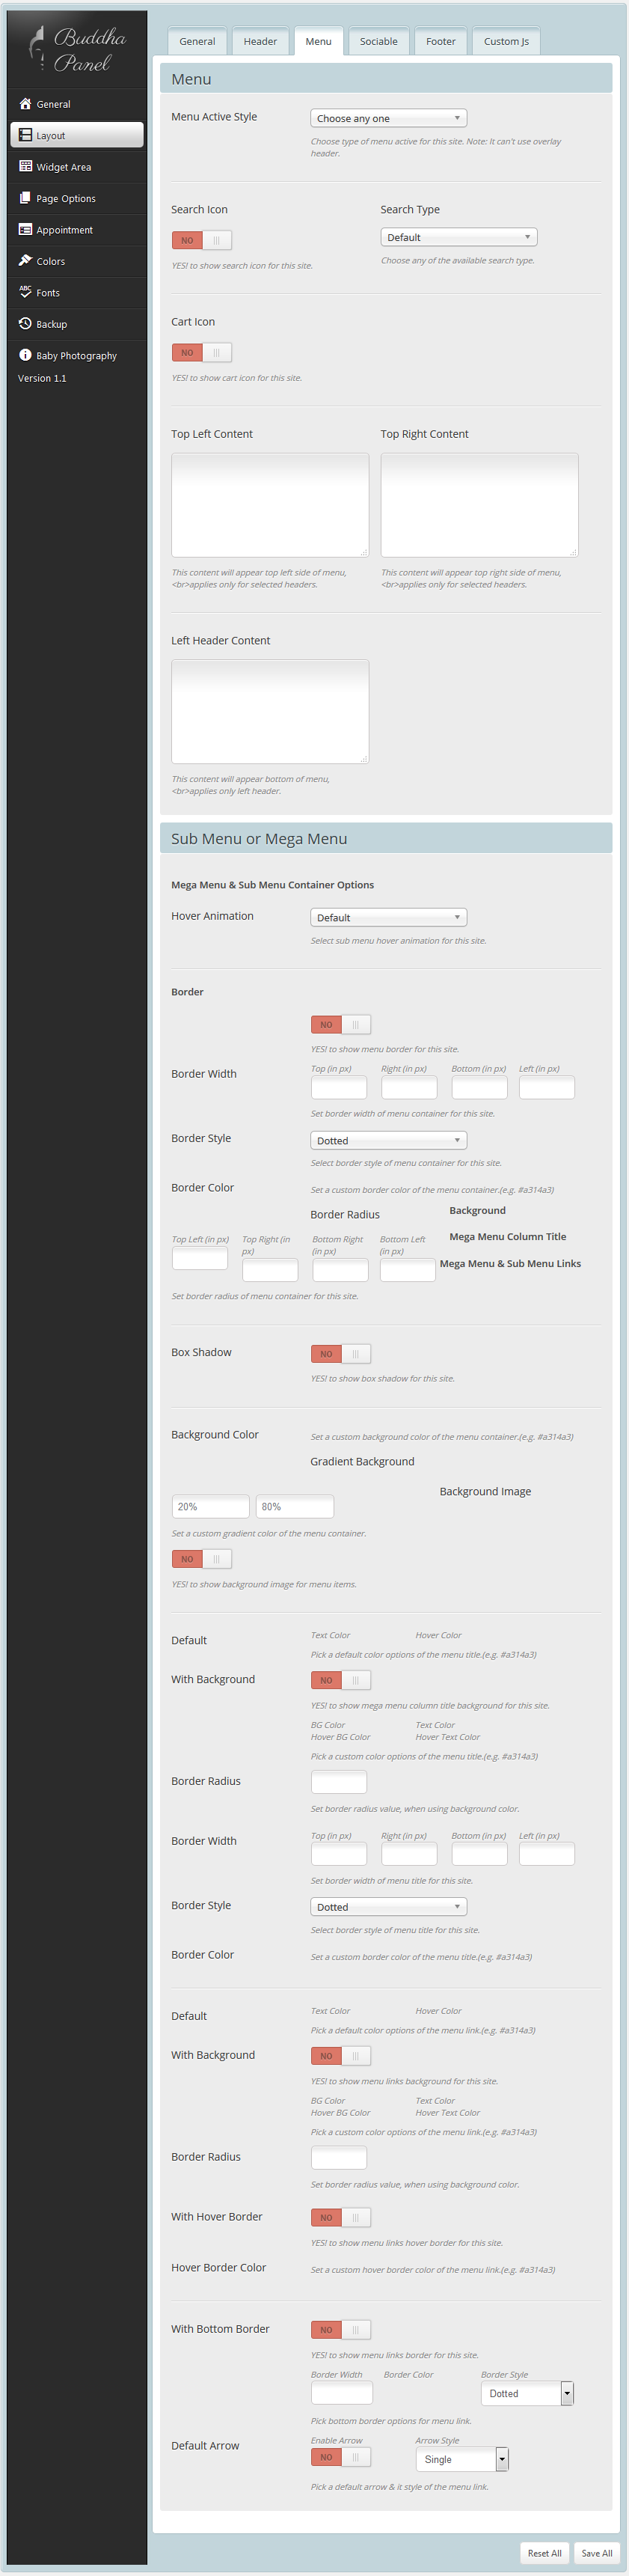
Menu Settings
- Default Menu – if you want a default menu for a page, you need to first create it in Appearance > Layout > Menus, which also appears in the left-side main dashboard menu. You can then choose which one you want to use for your page. If you don`t choose any, the default menu will be used. This feature allows you to create different menus ( Highlight with Plus Icon, Highlight, Highlight Grey, Highlight with Arrow, Two Border, Double Border, Border with Arrow, Slanting Splitter ) for different pages. You are also provided with the toption for adding Serach Icon, Cart Icon (with left/right side of menu as you wish).
- Sub Menu/Mega Menu Settings Provided with the options like Menu animation, Border style ( width, style, color, radius), Box Shadow, Background (Color, Gradient BG, Image), Mega Menu Column title (Default, BG, Border-radius, Border-width, Style, Color) , includes for Mega Menu and Sub Menu links too. For Submenu Links you can add border & arrow styles.
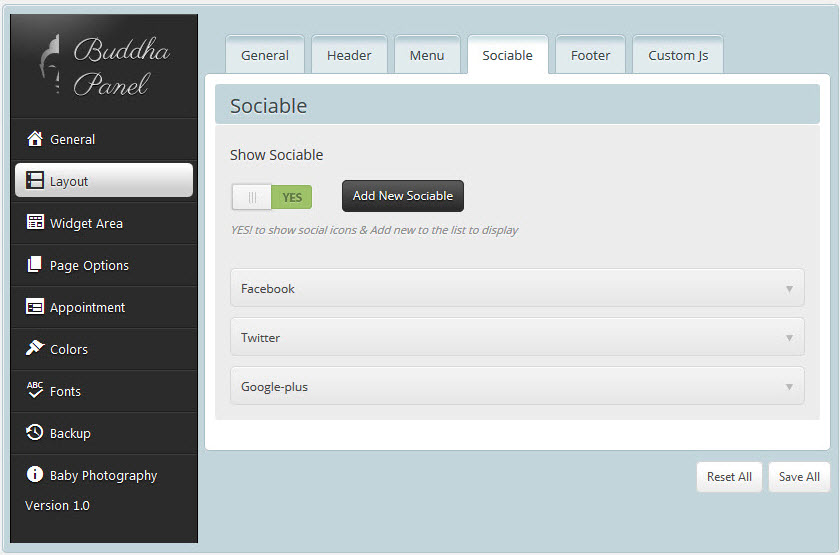
Sociable Settings
- Sociable Manage Social Network icons list to display. These social icons are a custom font icon, so it will always be super crisp and will not require any images. Using a font icon also allows us to have advanced color options. Social Icons can be used in several different areas and have multiple customization options.
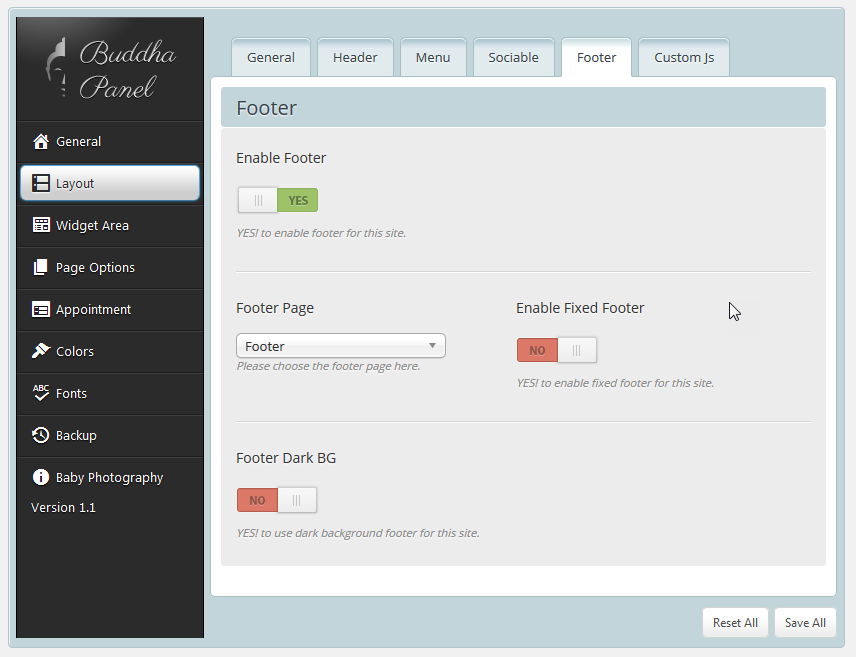
Footer Settings
- Layout – select a footer layout
- Style – select a footer style
- Background Image – upload a background image if desired
- Copyright – type your own text for the copyright section, or select “Default”.
- Copyright Darkbg – Enable or Disable for copyright dark bg
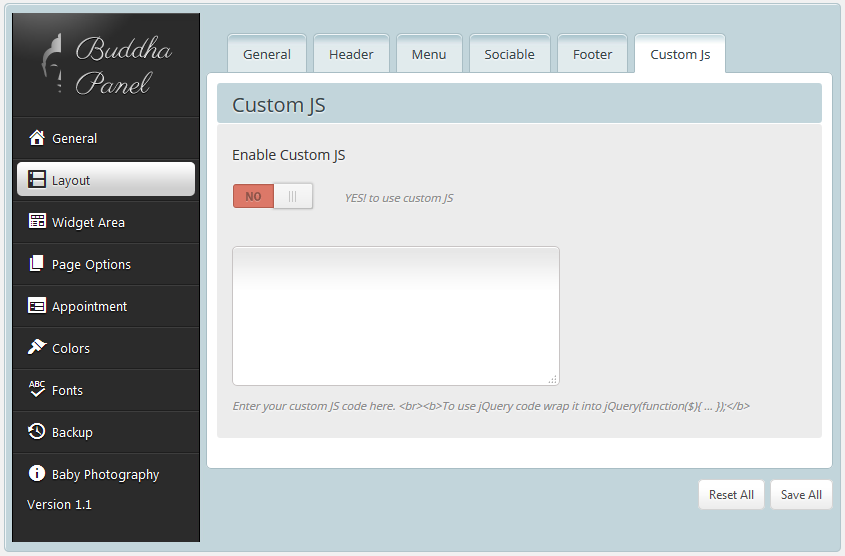
Custom CSS & js Settings
- Custom CSS Option – This option is where you can add CSS customizations to your website.
- Custom js Option – This option is where you can add js customizations to your website.
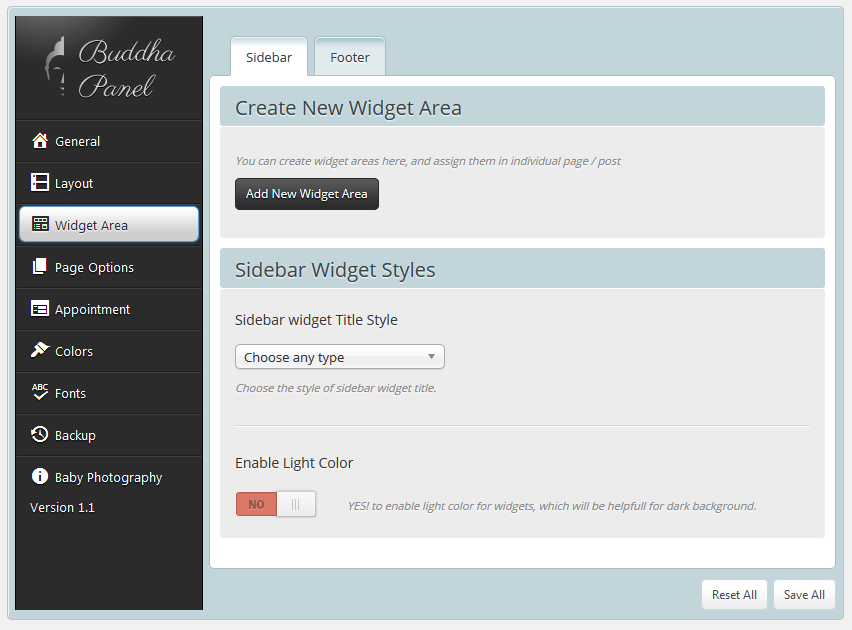
Widget Area Options
Widget Area – To create custom widget areas
Custom Widget Areas
- Widget areas created here will be left sidebar or right sidebar or megamenu.
- After creating new widget area here with specific title, go to Dashboard -> Appearance -> Widgets here you can see the new widget area that you have created.
- Add widgets for that widget area.
- You can add these widgets for 2 locations
- Page Sidebars – While choosing ‘Left Sidebar’ or ‘Right Sidebar’, you have this option ‘Choose Widget Area – Left Sidebar’ or ‘Choose Widget Area – Right Sidebar’. Here you can choose the newly created widget area here.
- Footer – You can create and assign the footer widgets from Appearance > Baby Photography Options > Widget Area > Footer > Create New Widget Area. Click Add New Widget Area button to create the widgets for footer and assign it your footer page.

Page Options
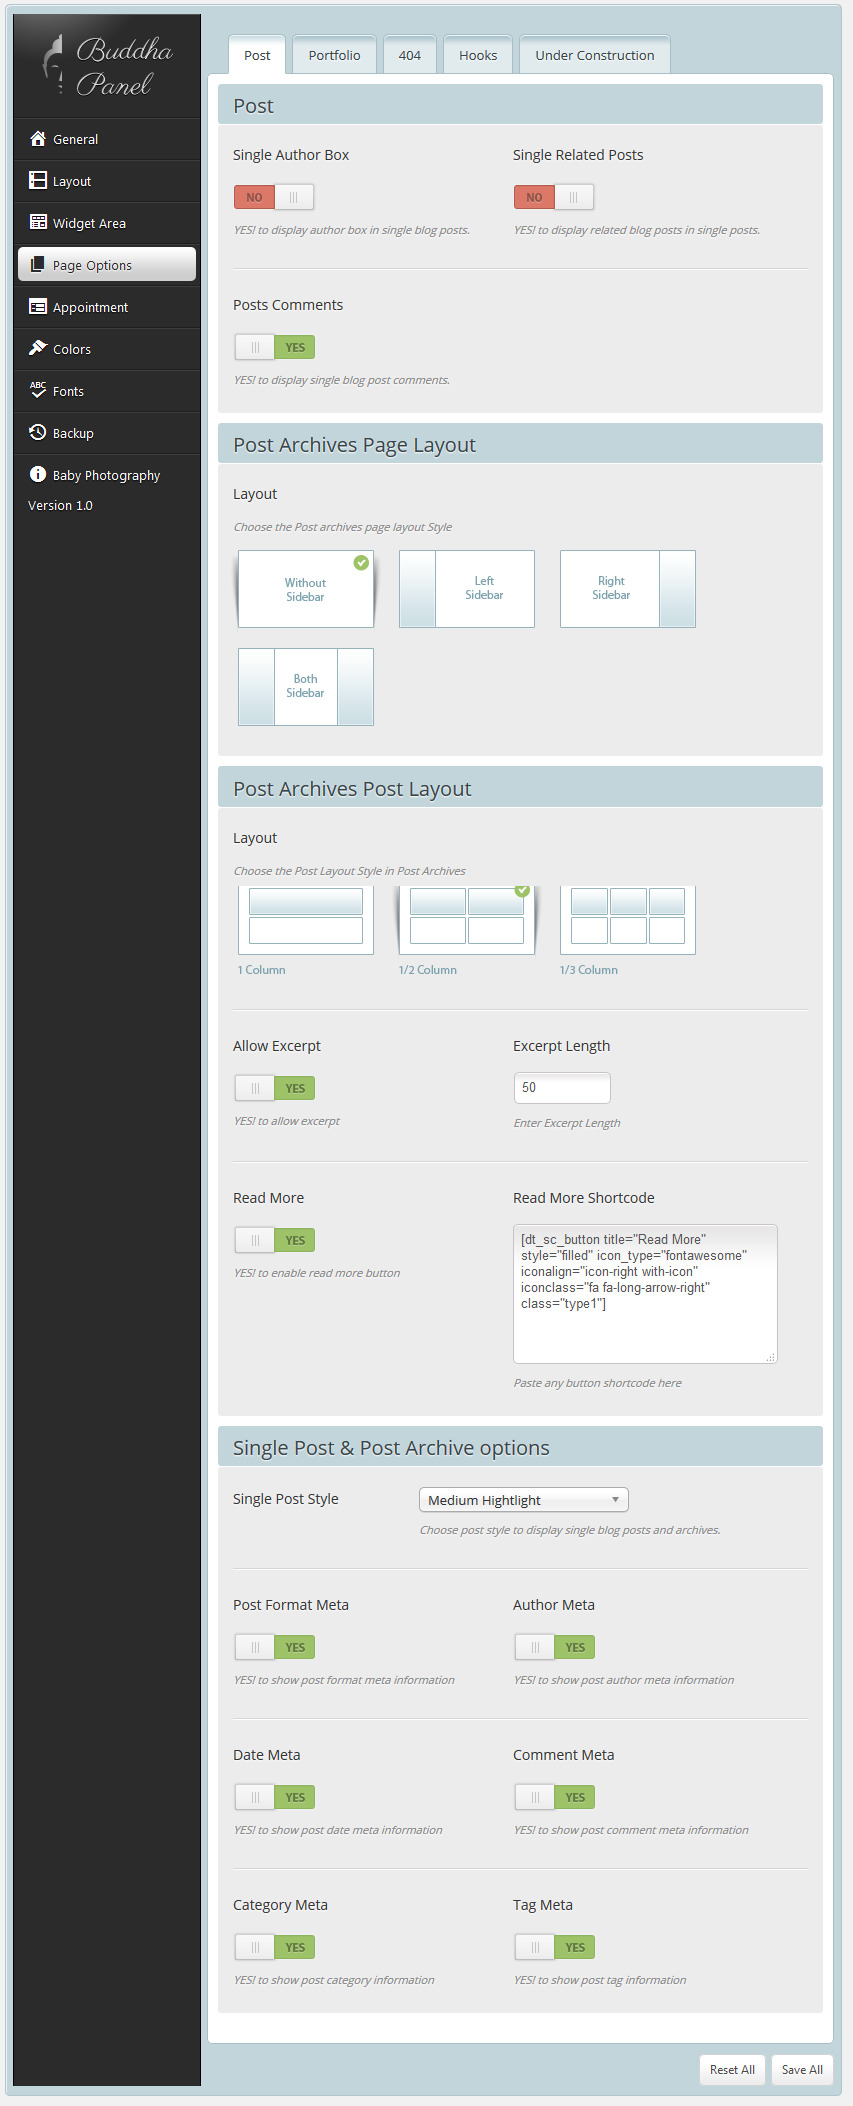
Post
- Post Single – Here you can show / hide ‘Author Box’ (contains author details) and ‘Posts Comments’.
- Post Archives – Choose any one of the available layout types. Also you can choose the archive page layout (without sidebar, left sidebar, right sidebar) and post layout (1 column, 2 column, 3 column)
- Archives and Single Post Options – Here you control the displaying of ‘Post Format’, ‘Author’, ‘Date’, ‘Comment’, ‘Category’ and ‘Tag’.
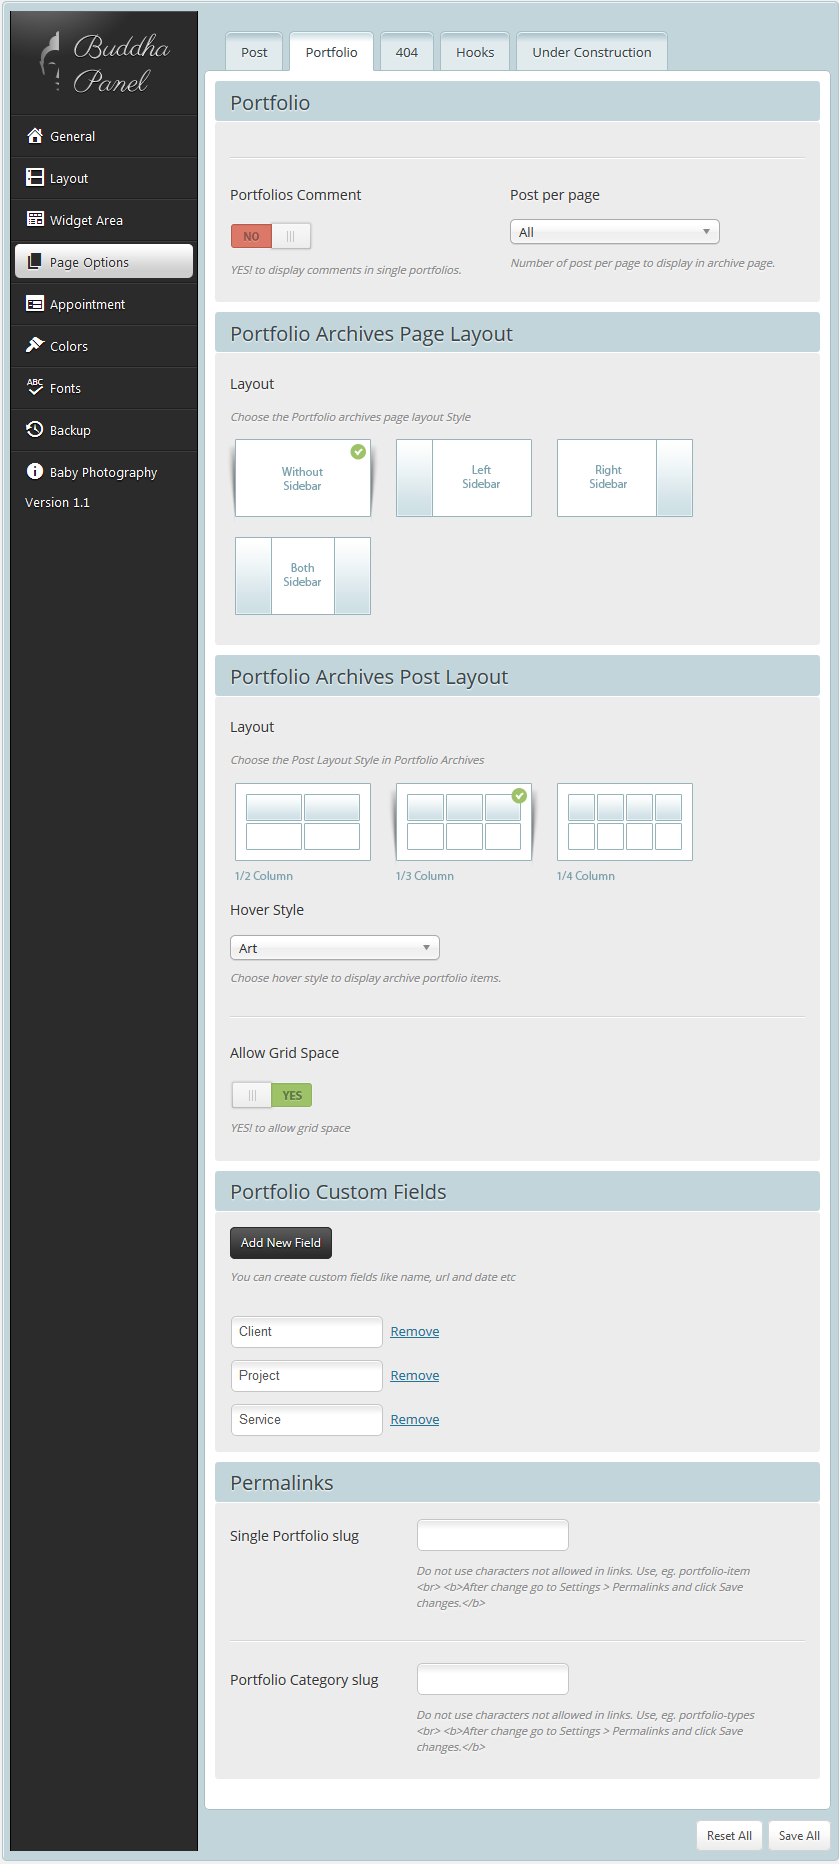
Portfolio
- Portfolio Single – Here you can show / hide ‘Related Portfolios’ and ‘Portfolios Comments’.
- Portfolio Archives – Choose any one of the available layout types. Also you can choose the archive page layout (without sidebar, left sidebar, right sidebar) and post layout (1 column, 2 column, 3 column, 4 column)
- Portfolio Custom Fields – You can add custom field(s) for portfolio here, which will be displayed in portfolio single page. You can add datas for this field while adding or editing portfolios.
- Permalinks – You can configure Single Portfolio slug and Portfolio Category slug, so that url of the portfolio single page and archive page will be changed respectively. After configuring here go to Dasboard -> Settings -> Permalinks -> Common Settings, here choose Post name and save it.
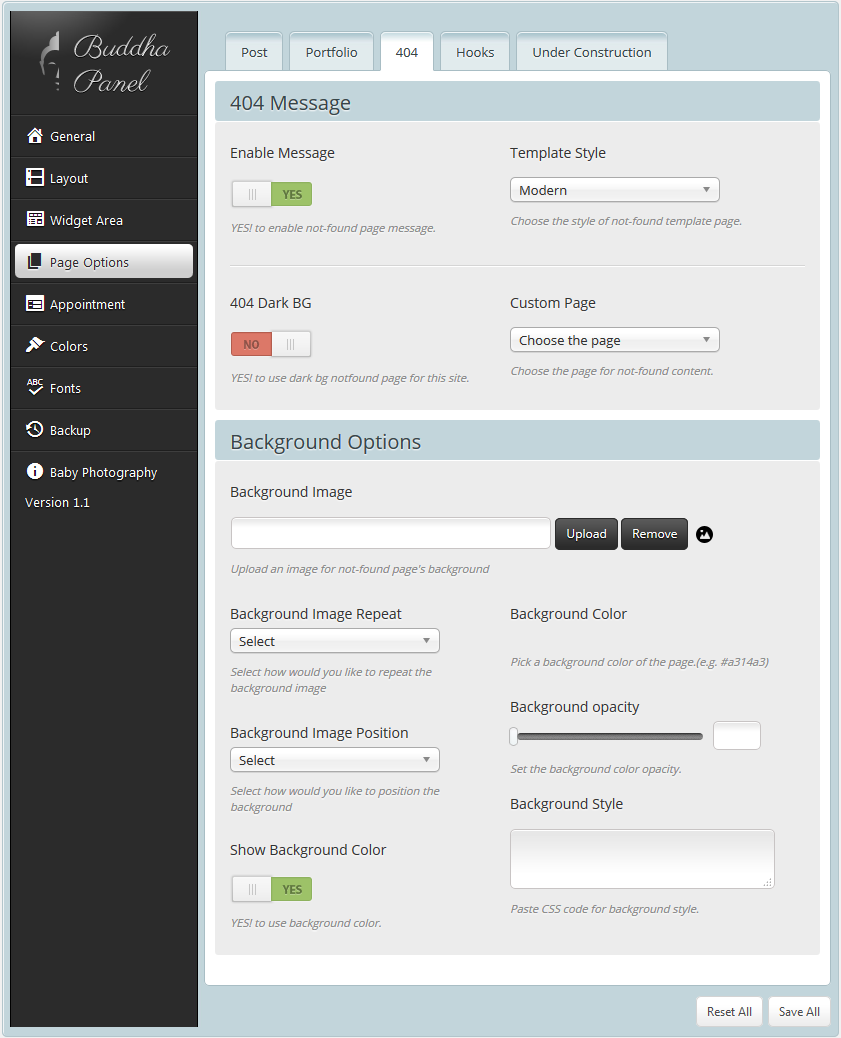
404
- 404 Page Layout – You can choose any of the page layout ‘without sidebar’, ‘left sidebar’ or ‘right sidebar’.
- 404 Message – Here you can add custom message for 404 page.
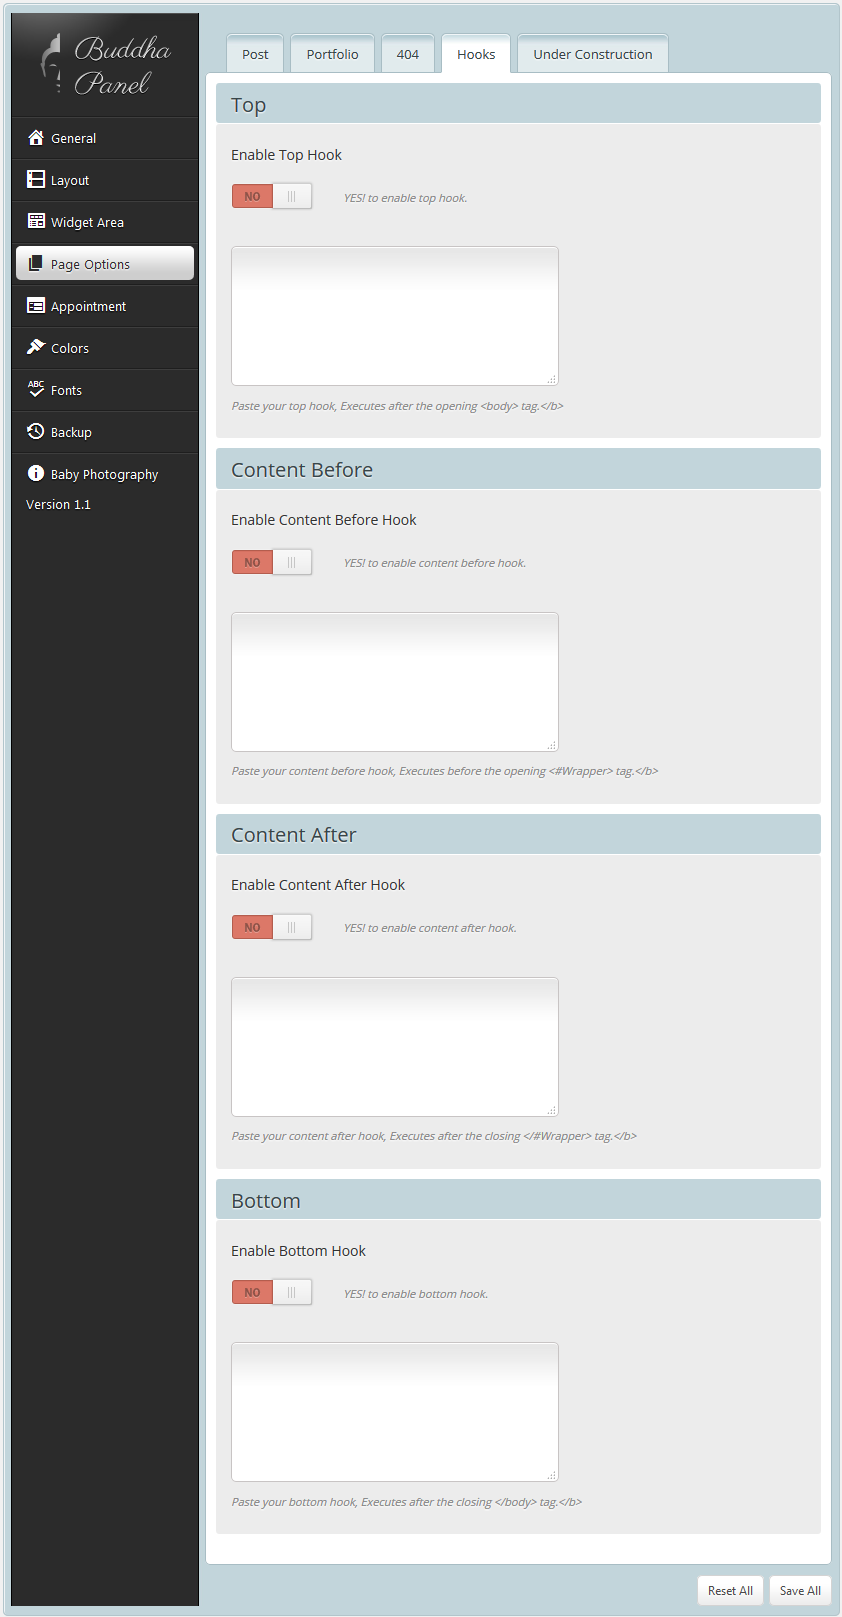
Hooks
- Top – You can add any content here which will be added after the opening of <body> tag..
- Content Before – You can add any content here which will be added after the opening of <inner-wrapper> tag..
- Content After – You can add any content here which will be added before the closing of </inner-wrapper> tag..
- Bottom – You can add any content here which will be added before the closing of </body> tag..
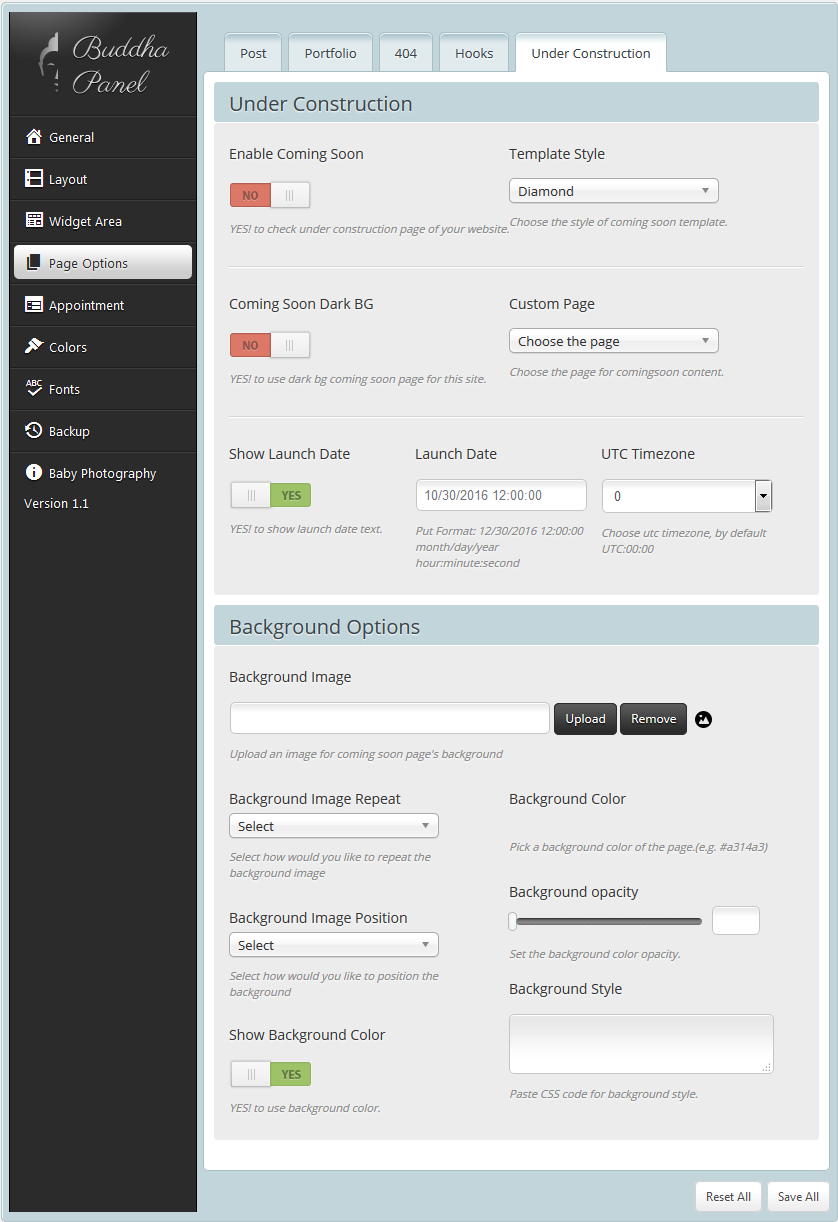
Under Construction
Options relating to the under construction page
- Enable Coming Soon – You can Enable/ Disable for under construction page of your website.
- Template Style – Choose the style of coming soon template..
- Coming Soon Dark BG – YES! to use dark bg coming soon page for this site.
- Custom Page – Choose the page for comingsoon content.
- Show Launch date – Enable/ Disable to show launch date text.
- Launch date – Put Format: 12/30/2016 12:00:00 month/day/year hour:minute:second
- UTC Timezone – select the appropriate timezone.
- Background Image – Upload an image for coming soon page’s background.
- Custom Styles – Paste custom CSS styles for under construction page.
Appointment Options
Appointment tab will be enabled in buddha panel only when DesignThemes Appointment Addon is installed and activated.
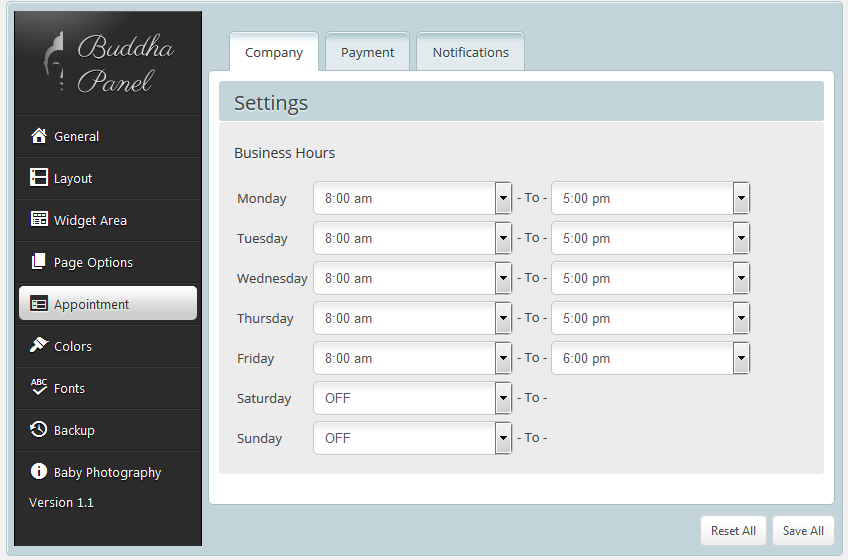
Company
- Here you can set the business hours for your company.
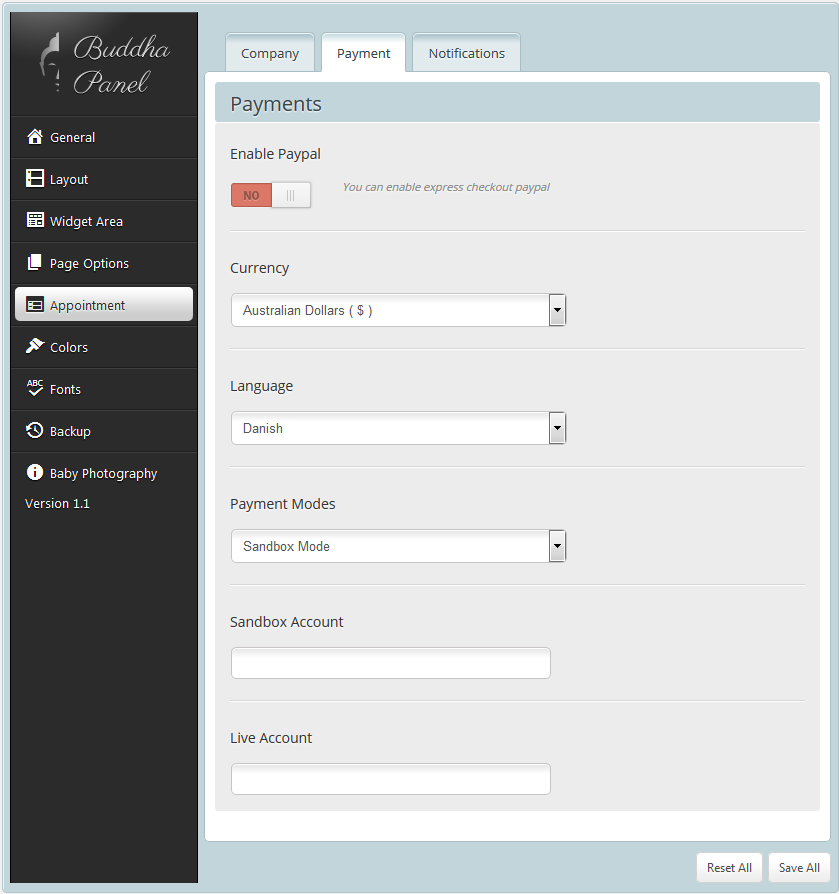
Payment
- You can set your currency here.
- You can also set Enable Pay At Arrival option which will user to book appointment without any payments.
- Next if you widh you can configure PayPal Payment Settings here. They are API Username, API Password and API Signature.
- If Enable Live options is set than all your transaction will be carried out in live server. If you wish to check your site with dummy entries than keep this option off.
Notifications
Helps to configure appointment notification for staff and customer.
- Settings – Configure sender name and sender email id here.
- To Staff – Apppointment notification for staffs are configured here. Notifications are for New Appointments, Modified Appointments, Deleted Appointments and Appointment Remainder.
- Settings – Apppointment notification for customers are configured here. Notifications are forNew Appointments, Modified Appointments andDeleted Appointments.
- Also you can configure Success Message and Failure Message of booking appointments.

Colors Options
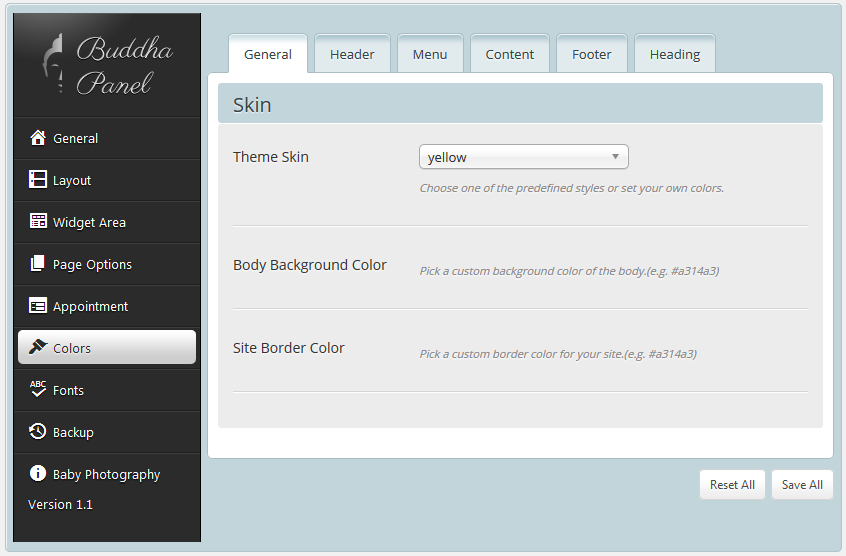
General Settings
Only two options are available in this section:
- Theme skin – Choose one of the predefined styles or set your own colors, Note: Custom color can be used only with the Custom Skin. Custom skin having 3 colors ( Default, Light, Dark Color)
- Body background – Pick a custom background color of the body.(e.g. #a314a3).
- Header – Choose a custom ( background color Background opacity ) of the header.
- Top Bar – Choose a custom ( BG Color, Text Color, Link Color, Link Hover Color ) of the top bar.
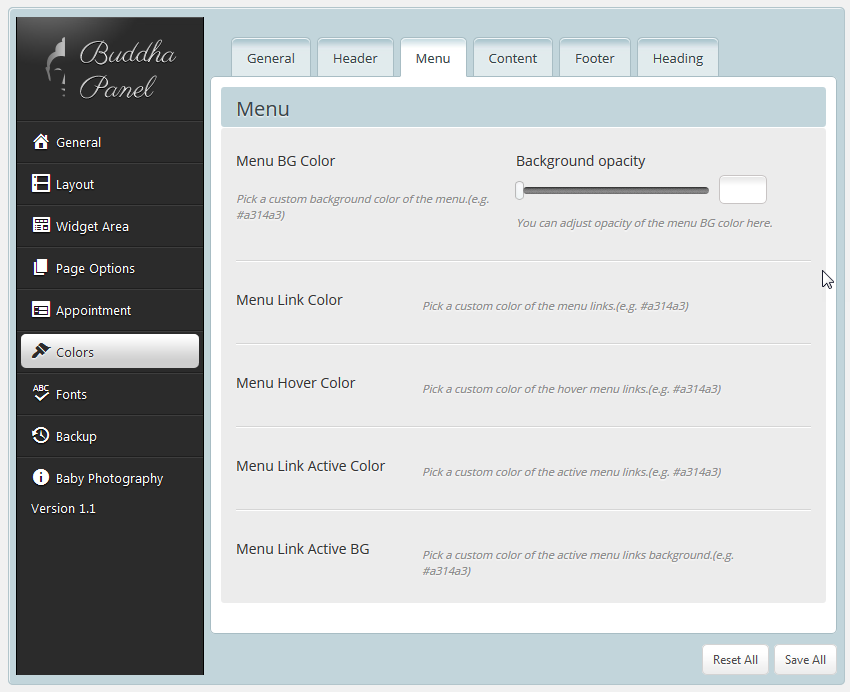
- Menu – Choose a custom Menu BG Color Background opacity of the menu.
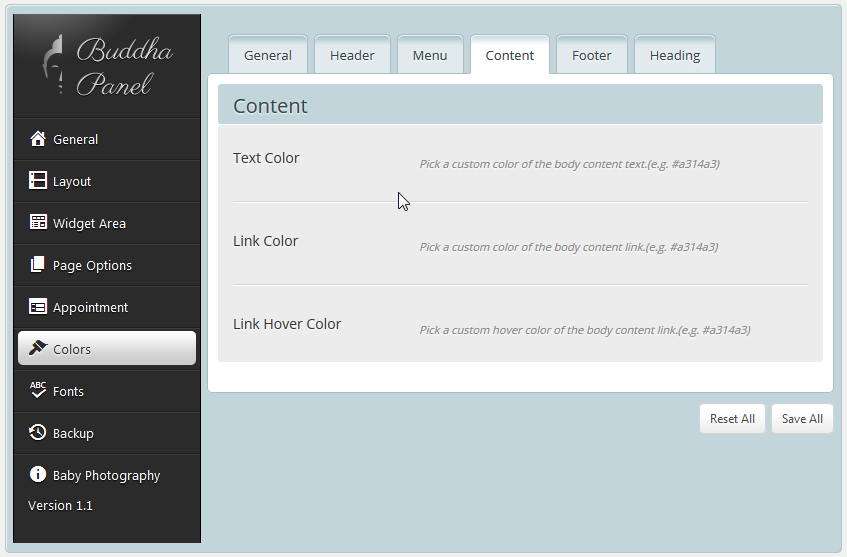
(Menu Link Color, Menu Hover Color, Menu Link Active Color, Menu Link Active BG). - Content – Choose a custom ( Text Color, Link Color, Link Hover Color ) of the Content.
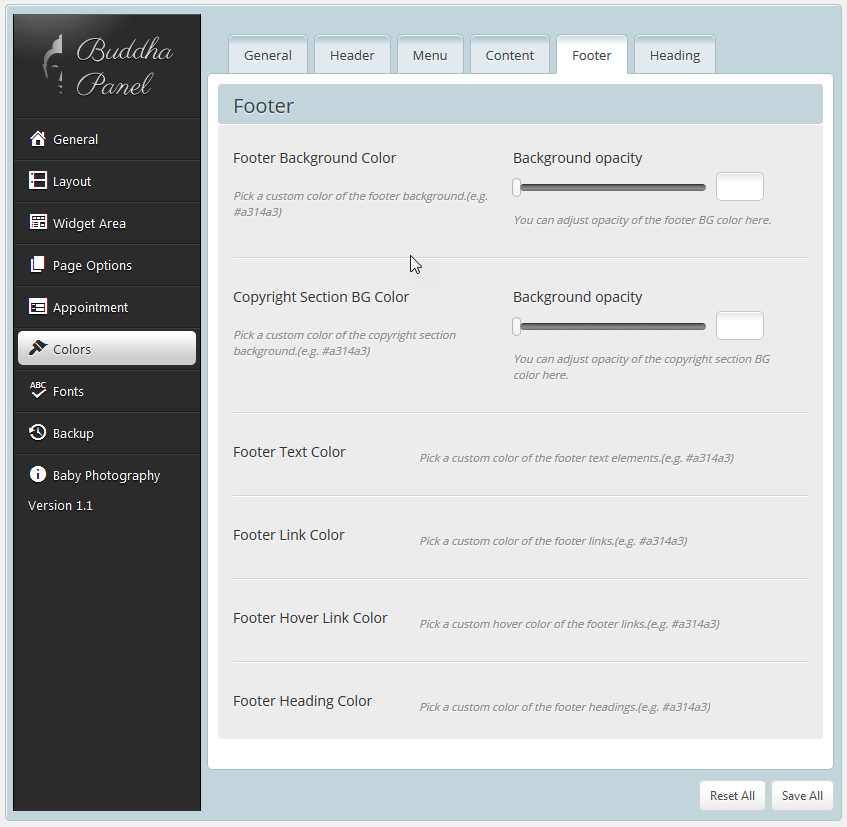
- Footer – Choose a custom ( BG Color, Text Color, Link Color, Link Hover Color, Footer Heading Color ) of the Footer.
- Heading – Choose a custom Heading color of the ( heading tag h1, h2, h3, h4, h5, h6 ) of the Heading.


Fonts
General
- General – You have option named ‘Disable All Fonts Settings’ to disable all font settings at once.
- Fonts Style & Subset – Font style & weight and font subset you have chosen here will be added to custom fonts you are going to add in below tab Custom Fonts.
- Custom Fonts – You have option to add 2 custom fonts for your site. Be causious while adding font name and you can upload custom fonts in one of following format .woff, .ttf, .svg, .eot
Content
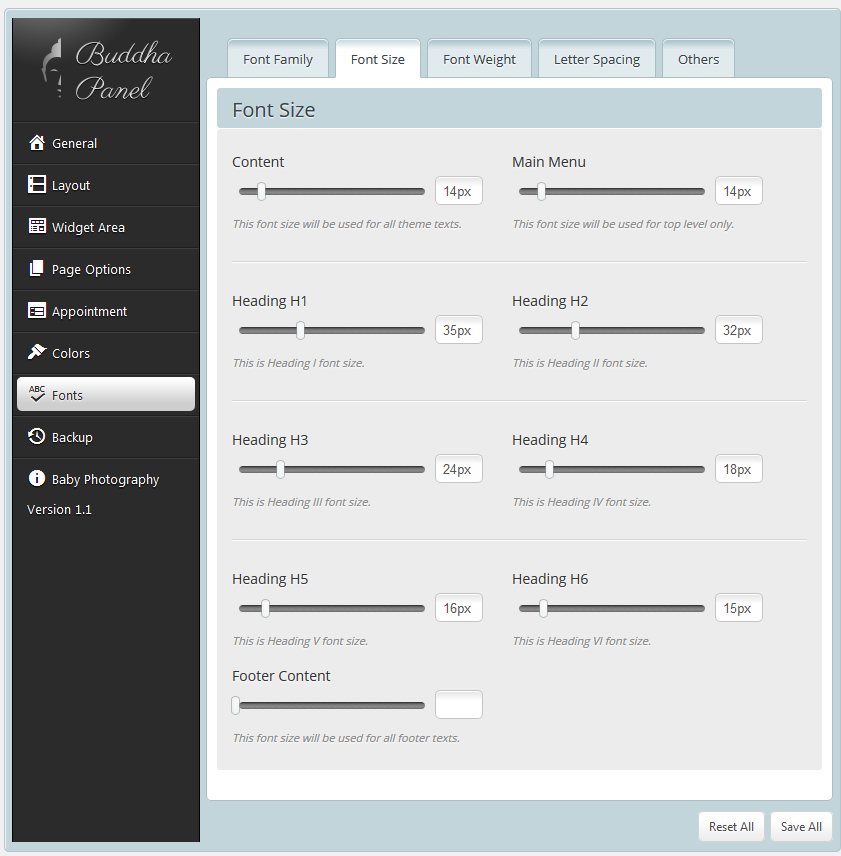
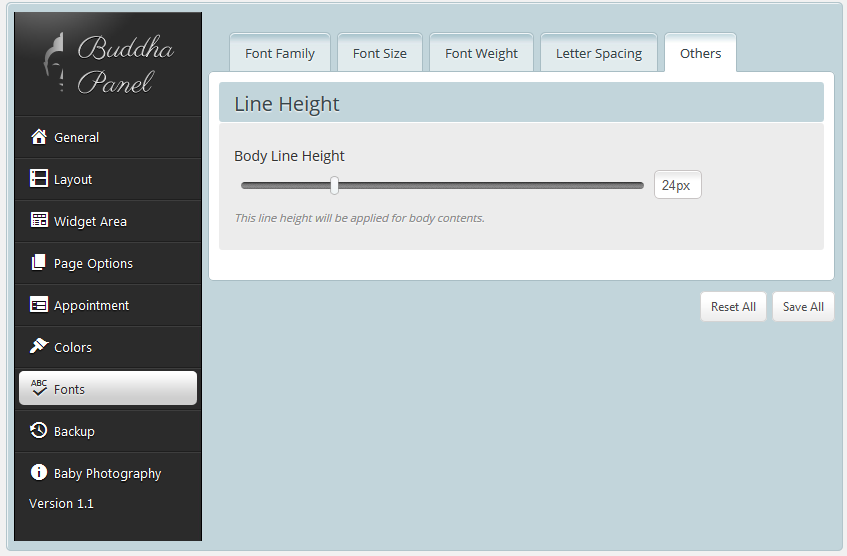
- You can choose Font Family, Font Size, Font Weight, Font Style and Line Height (px) for general contents of your site.
Menu
- Menu – You can choose Font Family, Font Size, Font Weight, Font Style and Text Transform for first level menus.
- Sub Menu – You can choose Font Family, Font Size, Font Weight, Font Style and Text Transform for all level sub menus.
Page Title
- You can choose Font Family, Font Size, Font Weight, Font Style and Text Transform for page title (breadcrumb).
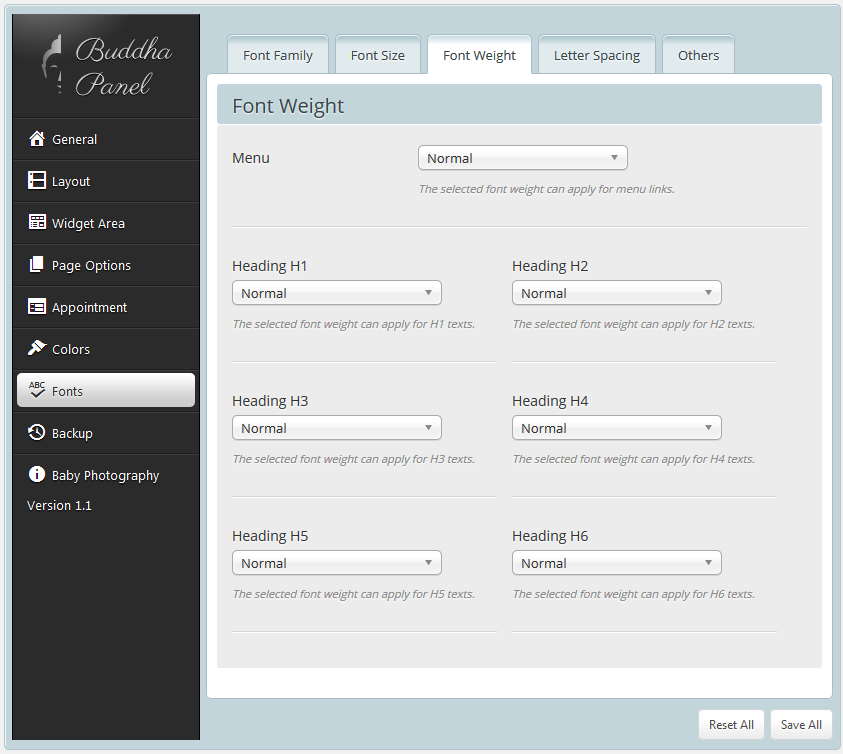
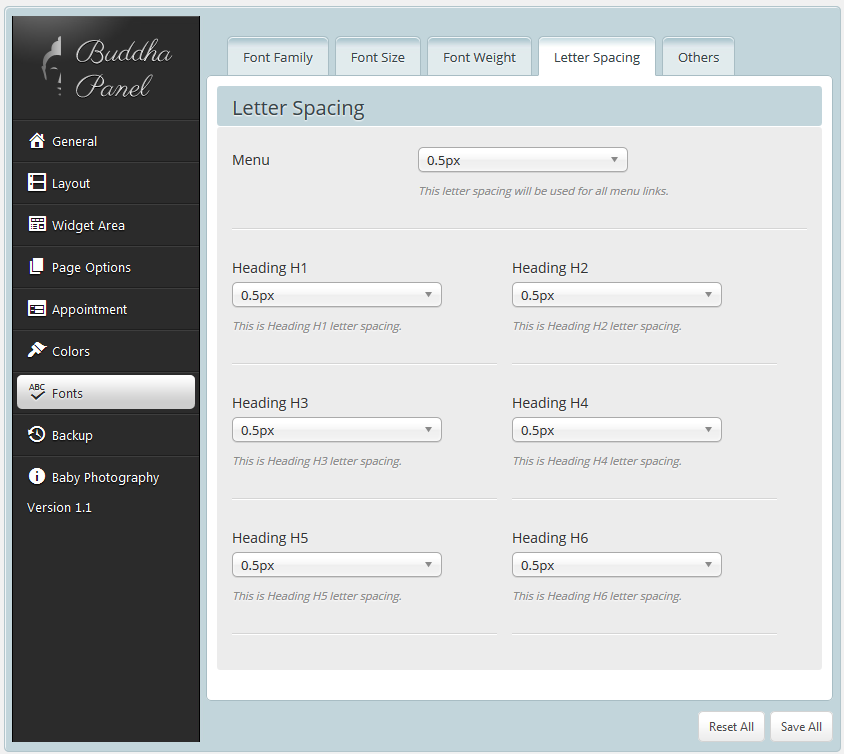
Headings
- H1, H2, H3, H4, H5, H6 – You can choose Font Family, Font Size, Font Weight, Font Style, Text Transform, Line Height (px) and Letter Spacing (px) for all heading tags.

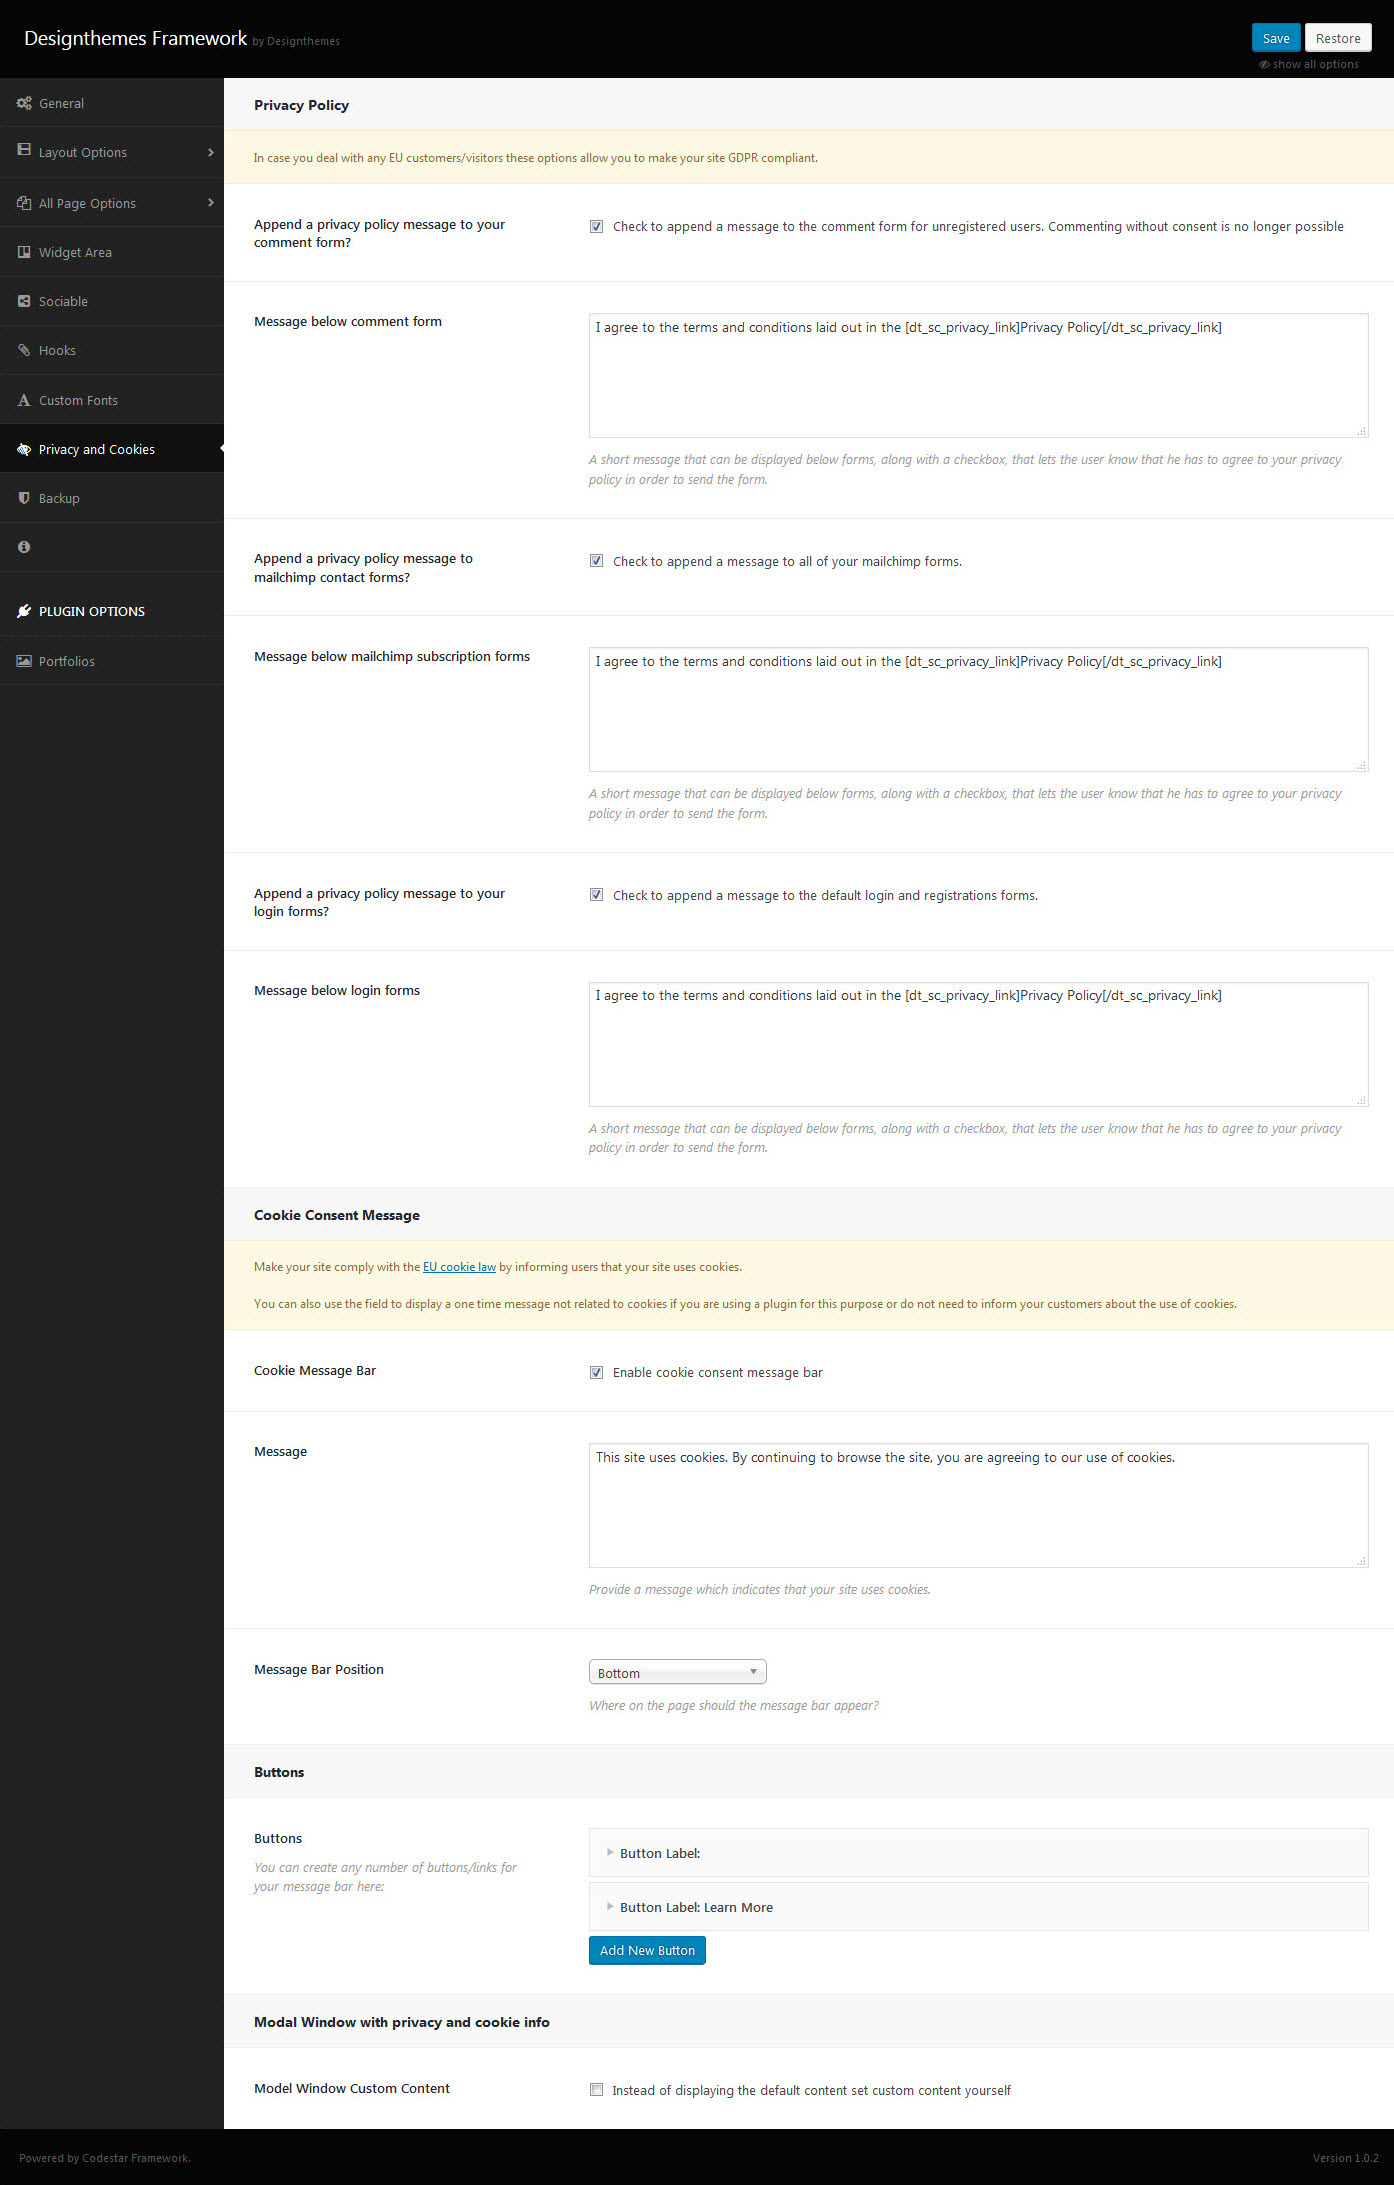
Privacy and Cookies
In this tab you can customize your Privacy and Cookies option for comment form, mailchimp contact forms and login forms.
You can create Cookie Consent Message with the option of Cookie Message Bar with Message, Message Bar Position.
And You can create any number of buttons/links for your message bar with Add New Button option.
And also you can enable or disable Modal Window with privacy and cookie info Instead of displaying the default content set custom content yourself.
Privacy Policy
Append a privacy policy message to your comment form? – Check to append a message to the comment form for unregistered users. Commenting without consent is no longer possible.
Message below comment form – A short message that can be displayed below forms, along with a checkbox, that lets the user know that he has to agree to your privacy policy in order to send the form.
Append a privacy policy message to mailchimp contact forms? – Check to append a message to all of your mailchimp forms.
Message below mailchimp subscription forms – A short message that can be displayed below forms, along with a checkbox, that lets the user know that he has to agree to your privacy policy in order to send the form.
Append a privacy policy message to your login forms? – Check to append a message to the default login and registrations forms.
Message below login forms – A short message that can be displayed below forms, along with a checkbox, that lets the user know that he has to agree to your privacy policy in order to send the form.
Cookie Consent Message
Cookie Message Bar – Here you can enable cookie consent message bar.
Message – Here you can provide a message which indicates that your site uses cookies.
Message Bar Position Here you can choose Where on the page should the message bar appear? Like Top / Bottom / Top Left Corner / Top Right Corner / Bottom Left Corner / Bottom Right Corner.
You can create Cookie Consent Message with the option of Cookie Message Bar with Message, Message Bar Position.
Buttons
Buttons -You can create any number of buttons/links for your message bar with Add New Button option.
Modal Window with privacy and cookie info
Model Window Custom Content – Here you can enable or disable Modal Window with privacy and cookie info Instead of displaying the default content set custom content yourself.
Backup Options : Backup & Restore Options
Backup Options these options allow you to backup and restore your custom settings and options. These options also allow you to transfer Theme Options data from site to site.
- Backup Options => helps you to take backup of current Designthemes Framework settings.
- Restore Options => helps you to restore Designthemes Framework settings from last backup.


Leave A Comment?